Pages

Friday, March 30, 2018

Hello Coffee! Good-bye Dies R Us...

Hello Coffee! and Hello to the new design team members you will be meeting next month.  As for me, this marks my last post as a Dies R Us Design team member.  I have greatly enjoyed my extended stay on the team.  It has been a pleasure to create with the wide variety of  brands in the STORE .  I have been introduced to some fantastic designers to which I will be loyal to for years to come.  I am also very excited about all the "other" products I have recently purchased such as Distress inks and the very helpful Tutti Designs Poke ToolsThanks to the Dani, Darlene and all the DT members for a great run!

Today I am using my latest purchase the Karen Burniston Coffee Cup Pop Up dies.  I find these pop up dies to be fairly easy to assemble, however, I always find a video to watch before I attempt it myself.  You can view Karen's own video or find another version.  I usually watch two to catch all the nuances of a new complex die. I found the actual mechanism of this pop up to be very different from others I own.  It is really neat and allows a place for a gift card.


I did not plan on using this as a gift card holder so I centered my coffee cup, but you can place this pop up mechanism where ever you desire on the fold.  It is awesome!


Here's a closer look at my cup.  The napkin the cup sits on has some really neat embossing that is hard to see in the picture.  I tried to highlight it a bit with ink.


I used only dies that came in the set except the Karen Burniston Greetings Hello and the Frantic Stamper Stitched Cut Corners background for the front of the card. 


Dies R Us product:

Karen Burniston - Dies - Coffee Cup Pop-Up
Karen Burniston Coffee Cup Pop Up

Karen Burniston - Dies - Greetings
Karen Burniston Greetings
Frantic Stamper - Dies - Stitched Corner-cut Tags
Frantic Stamper Stitched Cut Corners

Thanks so much for stopping by and I hope to see you all around in blogland!


Alicia

Don't forget to come join in the fun at the Dies R Us Challenge Blog. There's a new challenge theme offered on the 1st and 15th of each month and one lucky randomly drawn winner will receive a gift voucher prize to the Dies R Us Store. For your convenience, all the important Dies R Us links are provided below.


click below for:

Thursday, March 29, 2018

Willow Girl~Watercolor with Quick Quotes Powderpuff chalking inks

Hello, I have been playing with the latest 2018 PowderPuff Chalking Ink Set.  I love to use a water brush to color an image with the inks.  I recently won this image and I could not have found a more perfect piece of paper on which to stamp it.  This sheet is from the soon to come Spring Showers collection as are the flowers die cuts I created.


Here I am coloring my image.  I stamped and embossed the image to withstand the water I will be using.  The raised edge also helps to contain the ink within the proper place.  I usually paint several layers depending on the intensity of color I desire.  Quick Quotes papers hold up to the many layers and water as well.


I finished my card off with stamping and embossing the sentiment to match.  I die cut the sentiment and added some die cut flowers.  I used sequins in the center of my flowers as well as sprinkling a few among my flower border.  I like to finish off my sequins with a dot of pearl drops to cover the hole.  I think it just looks so neat.


I hope you try using the latest 2018 PowderPuff Chalking Ink Set or any of your Quick Quotes Powderpuff Chalking inks to water color.  The results are beautiful.

Quick Quotes products:
Papers from Spring Showers and Navigator (coming soon)


other products:

stamps by Unity Stamp Co Willow Girl
die cuts by Sizzix/Tim Holtz florals
die cut by Tutti Designs scallop stitched circle
black pigment ink and embossing powder by Judikins
sequins and pearl drops


Thanks so much for stopping by!


Wednesday, March 28, 2018

DCWV Boho Feather Thanks card

Hello and thanks for checking out my blog today.  As I am fond of doing, I have combined a couple of task in today's card.  First, I am participating in a card swap with a feather theme.  I knew the papers and embellishments I wanted to use so I perused the sketch blogs for something that worked.


I found the perfect sketch over  Sketch N Scrap.  It was perfect with the feather paper I wanted to use and the strips of paper across the middle was a great way to diffuse the busy print.


I made enough for my swap and an extra one to keep!


Close up of my embossed feathers.


Ingredients:
DCWV Boho Style paper stack
Creative Memories card stock
Stampin Up Four Feathers stamp and die set (3 years old)
Stampin Up scallop circle punch
Joy Clair Hello sentiments set (thanks)
Versamark ink
various embossing powders including Ranger and Judikins
Quick Quotes Mocha Moma chalking ink
gems

I would like to enter this in the following challenges:


Thank you so much for stopping by!

Alicia

Tuesday, March 20, 2018

Spring Blooms~Quick Quotes Serenade layout

Good morning, Alicia with you today.  I love to take pictures of flowers.  Here I am scrapping a sequence of photos from some blooming bushes last year.  I pass them on my dog walk every day so I snapped these all within about five days from buds to full bloom.


I am fond of using all my scraps and you may notice my frame is leftover from the September 2017 past Club Q.  It provided the perfect place for my title to really pop and balance the stripes.  I cut the title with my Cricut, I have said before and I will say it again, Quick Quotes papers cut like butter in die cut machines.  The papers still hold up to shaping and distressing after die cutting as I have done with the layered flowers.


.

I thought adding a small flower as the dot on the "i" was a whimsical touch for my layout.


The purple mat on which I journaled was a piece from a former Club Q also.  Of course, all the flowers were cut from various scraps.  In fact, the only whole sheet I used was the Serenade 105, the striped background.


Quick Quotes products:

other products:
flower dies by Tim Holtz/Sizzix
title font by Cricut Art Nouveau font
brads


Thank you for stopping by!

Monday, March 19, 2018

Looking Sharp! Cactus Fold-a-long

I have been playing with my new Sizzix Cactus Fold-a-long die again. You can view my first one with Quick Quotes papers here.   This version uses more of a cactus green card stock with some pretty pink flowers.  I created a sleeve for this version to hold the card together.  I used kraft card stock to mimic a clay pot.


This inside definitely has that wow factor.  I did not make this version with a face.  Instead I used another cactus die set that included the lizard die.  I thought he looked cute crawling around.


I added some green print paper inside to break up the solid green card stock.


Ingredients:
Sizzix Fold-a-long Cactus die
Spellbinders Cactus die (lizard)
card stock and papers
Quick Quotes Tropical Punch and Cactus chalking inks

I would like to enter this in the following challenges:


I used fun fold, dimension and blue

m1418


Thanks so much for stopping by!

Alicia


No outfit is complete without dog hair...Atlantic Hearts Challenge

It's my week again at Atlantic Hearts Challenge.  On one hand I think this card is a little too simple but on the other that grey just pops on the rusty orange.  It all came together so easy with the great sketch.


Here's this week's sketch:


A close up of my doggy.


Ingredients:
Tim Holtz/Sizzix Dog Talk stamp and framelits
Hobby Colour Cool grey alcohol markers
Judikins clear/black embossing powder mix
Our Daily Bread Designs double stitched rectangle die
Creative Memories papers
Toomuchfun rubber stamp sentiment
Quick Quotes Cool  Grey Powderpuff chalking ink

I would like to enter this in the following challenges:


Thanks so much for stopping by and don't forget to play along with Atlantic Hearts Challenge this week.
Atlantic Hearts Sketch Challenge


Alicia

Friday, March 16, 2018

Sympathy Cards with Judikins Mica gloss

I recently participated in a sympathy card swap.  These are the cards I created.  I started with my Judikins Micagloss backgrounds.  I die cut them and then stamped and heat embossed the sentiment.


Opposite the sentiment I created some large purple flowers.  I used a brad to keep all the layers together and distress with Quick Quotes Powderpuff chalking ink.   I even had some purple velvety leaves to add, they complimented the micagloss background so well.  I think they turned out very pretty.  


I recently acquired this stamp as part of a collection I purchased on Craigs list.  She had many great sentiment stamps and a couple of other sympathy ones.


I used two different Frantic Stamper Stitched rectangle shaped dies, one with cut corners and one with rounded corners.  I love them both.


Ingredients:
Paper Inspirations Sympathy Calligraphy stamp
Judikins Mica Gloss and clear and black embossing powder
Frantic Stamper rounded and cut corner rectangle dies
black pigment ink
flowers and brads

I would like to enter these in the following challenges:

http://4craftychicks.blogspot.com/2018/03/4-crafty-chicks-394-brads.html until 3/20x

http://audsentimentschallengeblog.blogspot.com/2018/03/199-bingo-sentiment.html until 3/25 (embossing, stamp, stitching)x


https://scrapping4funchallenges.blogspot.com/2018/03/challenge-111-anything-goes-with-flowers.html until 3/29 x

http://craftrocketchallenges.blogspot.co.uk/2018/03/challenge-46-something-new.html until 3/31 (sympathy stamp new to me)x

Thanks so much for stopping by!

Alicia

Friday, March 9, 2018

Cup of Joe Blog Hop


Welcome to the Cup of Joe Blog Hop


This is a blog hop featuring projects full of my favorite drink, COFFEE!! So grab your favorite cup of Joe and enjoy a coffee break with  all these fabulous projects!


You should have arrived from Holli's blog but if not head over to 
Connie Can Crop, she  is the beginning of this hop!! 

This is a one day blog hop, but you have until Sunday at 10pm to finish hopping and leaving your love for all of these talented crafters.
You will have until 10 pm Sunday to finish the hop and leave your comments on every blog to be eligible to win. 


One lucky hopper will win 3 free SVG files from our fabulous sponsor this month!!


What do you need to do to win? Easy... become  a follower of each of the fabulous blogs in this hop and leave each of them a comment letting them know what you like best about their projects.

Winners will be announced on Wednesday 3/14/18 at Connie Can Crop.
Be sure to follow everyone and leave a comment along the way!


Hello, I was recently challenged with a die cut gatefold swap, so I killed two birds and made them coffee related to satisfy this commitment. I hope my partners enjoy them.


I have many coffee sentiments to choose from, with this challenge I was sticking with one that would fit nicely on my band.  I chose these from a couple of my latest coffee themed stamp sets from Stamplorations and Maple & Ink.


I also embossed each side of the gatefold and distressed with Quick Quotes chalking ink.  There is a trick to it since you don't want to flatten your embossing you have to emboss last.  So...I did run each side through independently, more work but worth is for a chance at perfection. 


Here's my open gatefold.  I thought the Tim Holtz blueprint stamp was perfect for the inside which reveals the "blueprint" part.


Ingredients:
Tim Holtz Coffee Time stamp and die set with On the Go embossing folder
Stamplorations After Coffee stamp set
Maple & Ink Espresso Yourself stamp set
Stampin Up Close to Cocoa
Quick Quotes Mocha Moma Chalking ink
vanilla and brown card stock


Next head on over to Vicky's Scrapping Passion


Here's our line up in case you get lost along the way:

Steampunk Owls for Dies R Us

Hello, Alicia on the blog today. I recently made a new purchase from the Dies R Us store and I envisioned this card before I even received the dies in the mail!  I was so excited to put all the gears and border together with the perfect gear paper.  


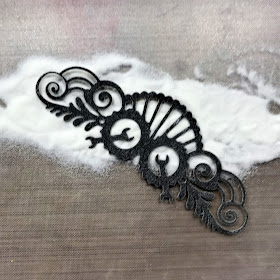
Part of my vision was to emboss my die cuts to give them a shiny coating.  I first die cut, then tapped on embossing ink and dipped in embossing powder before heating it to a perfect elevated shine.


I used my new Die Versions Tool set again to hold my die cuts steady while I heated the embossing powder.


Here's a close up of the layers of Memory Box Mini GearsCheery Lynn Owls with Gears  and brads.


Dies R Us products:
Tutti Designs - Scalloped Stitched Nesting Circles
Tutti Designs Nesting Scallop Stitched Circle
Memory Box - Dies - Mini Gears
Memory Box Mini Gears
Die-Versions - Tools - Picks-N-Pokes Tools
Die Versions Tools
Cheery Lynn Designs - Owls w/ Gears
Cheery Lynn Owls with Gears
Amy Design - Dies - Vintage Vehicles - Tool Border
Amy Design Vintage Vehicles Tool Border

Thanks so much for stopping by!
Don't forget to come join in the fun at the Dies R Us Challenge Blog. There's a new challenge theme offered on the 1st and 15th of each month and one lucky randomly drawn winner will receive a gift voucher prize to the Dies R Us Store. For your convenience, all the important Dies R Us links are provided below.

click below for:
STORE 
CHALLENGE BLOG
FACEBOOK
INSPIRATION BLOG
FRIENDS OF DIES R US PINTEREST PAGE

I would like to enter this in the following challenges:
http://crafting-with-dragonflies.blogspot.com/2018/03/99-birds-feathers.html until 3/17x

Alicia