Showing posts with label Distress Oxide inks. Show all posts

Tuesday, April 12, 2022

Kindred Stamps Futuristic Family stamps and stencil with Atlantic Hearts Sketch challenge

Hello and welcome to my latest project for Atlantic Hearts Sketch Challenge.  I had some new product strewn about my desk and decided to just play a little.  I used a stencil to create the "rays" with my latest Distress Oxide color, Salvaged Patina.  I found the die cut already cut in my stash.  I stamped the sentiment from the same ink.


Here is the sketch

Another look.


Ingredients:
Kindred Stamps Futuristic Family stamps set and stencil
Distress Oxide Salvaged Patina
Sizzix Circle, Scallop #2 Bigz die

Don't forget to play along with Atlantic Hearts Sketch Challenge until Sunday.


Thank you for stopping by today

Alicia


Friday, October 1, 2021

and they danced by the light of the moon...galaxy background with Cheery Lynn moon die

Hello and welcome to October  I have been trying to use up scraps and bits on my desk.  I had this die cut this Cheery Lynn moon a while ago and I had this galaxy background in my backgrounds stack..  I did add an extra layer of gold shimmer spray to match the die cut moon particularly for this card. It's not as visible in the photo as in real life..


I die cut the galaxy background and layered on top of black glossy card stock after stamping and embossing the sentiment in gold.


Ingredients:
Cheery Lynn Designs Hippie Heroine moon die
Tim Holtz Distress Oxide inks including black soot, squeezed lemonade and wilted violet
Tattered Angels and other shimmer mists
Our Daily Bread Designs double stitched rectangles (largest)
black glossy card stock and fine glitter paper
Rubber Cottage - Danced By sentiment
Colorbox gold ink and gold embossing powder

I would like to enter this in the following challenges:


Thank you for stopping by today.

Alicia

Monday, June 7, 2021

Catherine Pooler Slimline Essentials Nautical Card

Good morning, I am here today with nautical themed slimline card. I really enjoy playing with distress inks but I also like clean lines. This card combines both my passions.  I was able to get inky while keeping it clean. I used the Catherine Pooler Slimline Essentials dies. The set really does contain all the basics you need for wonderful slimline. 


This photo is the first layer of ink application.  I applied ink and splatter plain water here.  After the next layer of ink, I applied shimmer spray.  Finally, I die cut pieces from the optimal areas of the paper.


I love how the cuts turned out.  I added gems as eyes.


I clustered a few of the sand dollar cuts.


I inked the edges of all the cuts.


Products from Dies R Us Store:


Quick Quotes papers

I would like to enter this in the following challenges:


Don't forget to come join in the fun at the Dies R Us Challenge Blog. There's a new challenge theme offered on the 1st and 15th of each month and one lucky randomly drawn winner will receive a gift voucher prize to the Dies R Us Store. For your convenience, all the important Dies R Us links are provided below.

https://blogger.googleusercontent.com/img/b/R29vZ2xl/AVvXsEiq6-2iVzYbNBCc2u3Tz_sMuMRhwshQhKdX3yHEQrGKuu-2rA0FjqJFWsQOt7Hekp-mlBXkwWalo-id74lzQi8Q0GyE_jwNI5WtiyB2K-6xOTi56GytzJDRfPCEGqT-iD_GqlKc6dZm3xcJ/s320/*logo%2Bcollage.pages.jpg

click below for:

STORE

CHALLENGE BLOG

FACEBOOK

INSPIRATION BLOG

FRIENDS OF DIES R US PINTEREST PAGE

Thanks for stopping by


Monday, May 31, 2021

Karen Burniston and Lawn Fawn Out of this World Slider Card

Hello, today I am here with a slider card.  I began with a Distress Oxide ink background. I used several colors then went over the entire surface with Black Soot leaving some color visible.  I sprayed shimmer spray and used a Wink of Stella pen to create stars.


Next I die cut the center with the Lawn Fawn Slide On Over Wave die  In the meantime, I had already die cut the space ship and alien from the Karen Burniston Space Charms I cut the alien into pieces to fit into the space ship.  I added a layer of acetate on top of the alien there is a special die for this in the set.  I cut the other piece from silver metallic card stock. I added gems in the light holes. I used a pen to color the eyes and lips of the alien and tires of the ship using the embossing area of the die. I used the basic penny method to add the spaceship to the wavy slider cut.


I stamped the sentiment from Lawn Fawn Beam Me Up Stamps and die cut it with the banner die from Karen Burniston Triple Flip dies.


Dies R Us Store products used:


Lawn Fawn Slide On Over Wave die


I would like to enter this in the following challenges:

Don't forget to come join in the fun at the Dies R Us Challenge Blog. There's a new challenge theme offered on the 1st and 15th of each month and one lucky randomly drawn winner will receive a gift voucher prize to the Dies R Us Store. For your convenience, all the important Dies R Us links are provided below.

https://blogger.googleusercontent.com/img/b/R29vZ2xl/AVvXsEiq6-2iVzYbNBCc2u3Tz_sMuMRhwshQhKdX3yHEQrGKuu-2rA0FjqJFWsQOt7Hekp-mlBXkwWalo-id74lzQi8Q0GyE_jwNI5WtiyB2K-6xOTi56GytzJDRfPCEGqT-iD_GqlKc6dZm3xcJ/s320/*logo%2Bcollage.pages.jpg

click below for:

STORE

CHALLENGE BLOG

FACEBOOK

INSPIRATION BLOG

FRIENDS OF DIES R US PINTEREST PAGE

Thanks for stopping by


Monday, April 26, 2021

Cricut Mandalorian cards for Bitten By the Bug's Star Wars/Stars challenge

Welcome to the latest Bitten by the Bug 2's Star Wars or Stars challenge.  I had a lot of fun with this challenge.  I created an entire 8.5 x 11" page of galaxy background, so you are sure to see some more galaxy cards in the future.  For this first card, I popped a super cute cut of the child.  


Ingredients:
Cricut Star Wars Star Wars:  The Child cut
Distress Oxides: Black Soot, Wilted Violet, Twisted Citron, Picked Raspberry, Carved Pumpkin
Smooch vanilla shimmer mist
Kindred Stamps Galactic Sidekicks sentiment
misc papers

My second card is from another image set, Rise of Skywalker.  My husband wants this on a tee shirt.

Ingredients:
Cricut Rise of Skywalker cut
misc papers including chalkboard card stock

And my last card, I love it but it's not exactly as planned.  I know how to improve it, for one use green's instead of blues. I just went with the Cricut default colors because it looked sleek, but in reality I think it would have looked better in green shades.  I also used blue vellum, I just liked the color. 


After assembling the cut, I decided it would look really cool with light shining through. But how could light shine through on a card?  Well make the card out of acetate.  Here is a shot with the light behind the cut.  I stamped the sentiment in Staz-On because that is the ink that works on acetate.   


Ingredients:
Cricut Star Wars Star Wars:  The Child cut
Kindred Stamps Galactic Fighters sentiment
Midnight Blue Staz On ink
acetate, vellum, shimmer paper, chalkboard cardstock and other papers
black ink on edges

I would like to enter this in the following challenges:


You have until May 10 at 7 AM EST to join us at Bitten by the Bug 2's Star Wars or Stars challenge.

Thanks for stopping by

Alicia

Monday, April 5, 2021

Finnabair Trust the Magic with Dies R Us

Hello, I used several techniques to create this magical card.  I used a new stamp offering from the store, Finnabair Trust the Magic. First, I used Distress Oxide ink and a stencil to create a subtle background.  Then I stamped the image with black pigment ink and embossed with Ranger Embossing Powder-Bridal Tinsel.  I know you expect that powder to create a subtle sparkle and it's there but when you use black ink to begin the effect is a bit different.


Here's a side view where you can see the embossing from a another angle.  It's still hard a little hard to see the iridescent sparkle.


After the background was created, I die cut the frame and embellishments.  I used Elizabeth Craft Designs Dotted Scallop Squares to make a frame.  I was left with a beautiful scalloped square that I will use on another project.  I cut the Sue Wilson Industrial Chic Swirl just once in gold. I cut that one piece into several parts and adhered to the back of the frame which I popped up on dots to create dimension on my card.  This photo actually shows a bit of the iridescent embossing.


Memory Box Mini Gears is just one die which makes it easy to cut a lot.  I used it twice once in gold and once in pewter to compliment the inking.  I sprinkled those gears around the card.  I used a couple of different gems and stickers to fill in some of the centers of the gears.


One last look at my stamped image.  I also used the stamp set on some purple paper scraps and tore the edges.  After I inked the edges, I tucked those pieces into the corners that did not have as many die cuts.


I used the following products from the store:


I also used 
Black Pigment ink
metallic and other specialty paper
Ranger Distress Coordinations paper
gems, stickers and a bingo token

Don't forget to come join in the fun at the Dies R Us Challenge Blog.  There's a new challenge theme offered on the 1st and 15th of each month, and one lucky randomly drawn winner will receive a gift voucher prize to the Dies R Us Store.  For your convenience, all the important Dies R Us links are provided below.

Alicia


Monday, February 15, 2021

Double Trouble's Crazy Cousin Layers Challenge

Hello, it's time again to be a Crazy Cousin for Double Trouble Layers Challenge.  This challenge is all about layers.  I tried a new fold and piled on the layers.

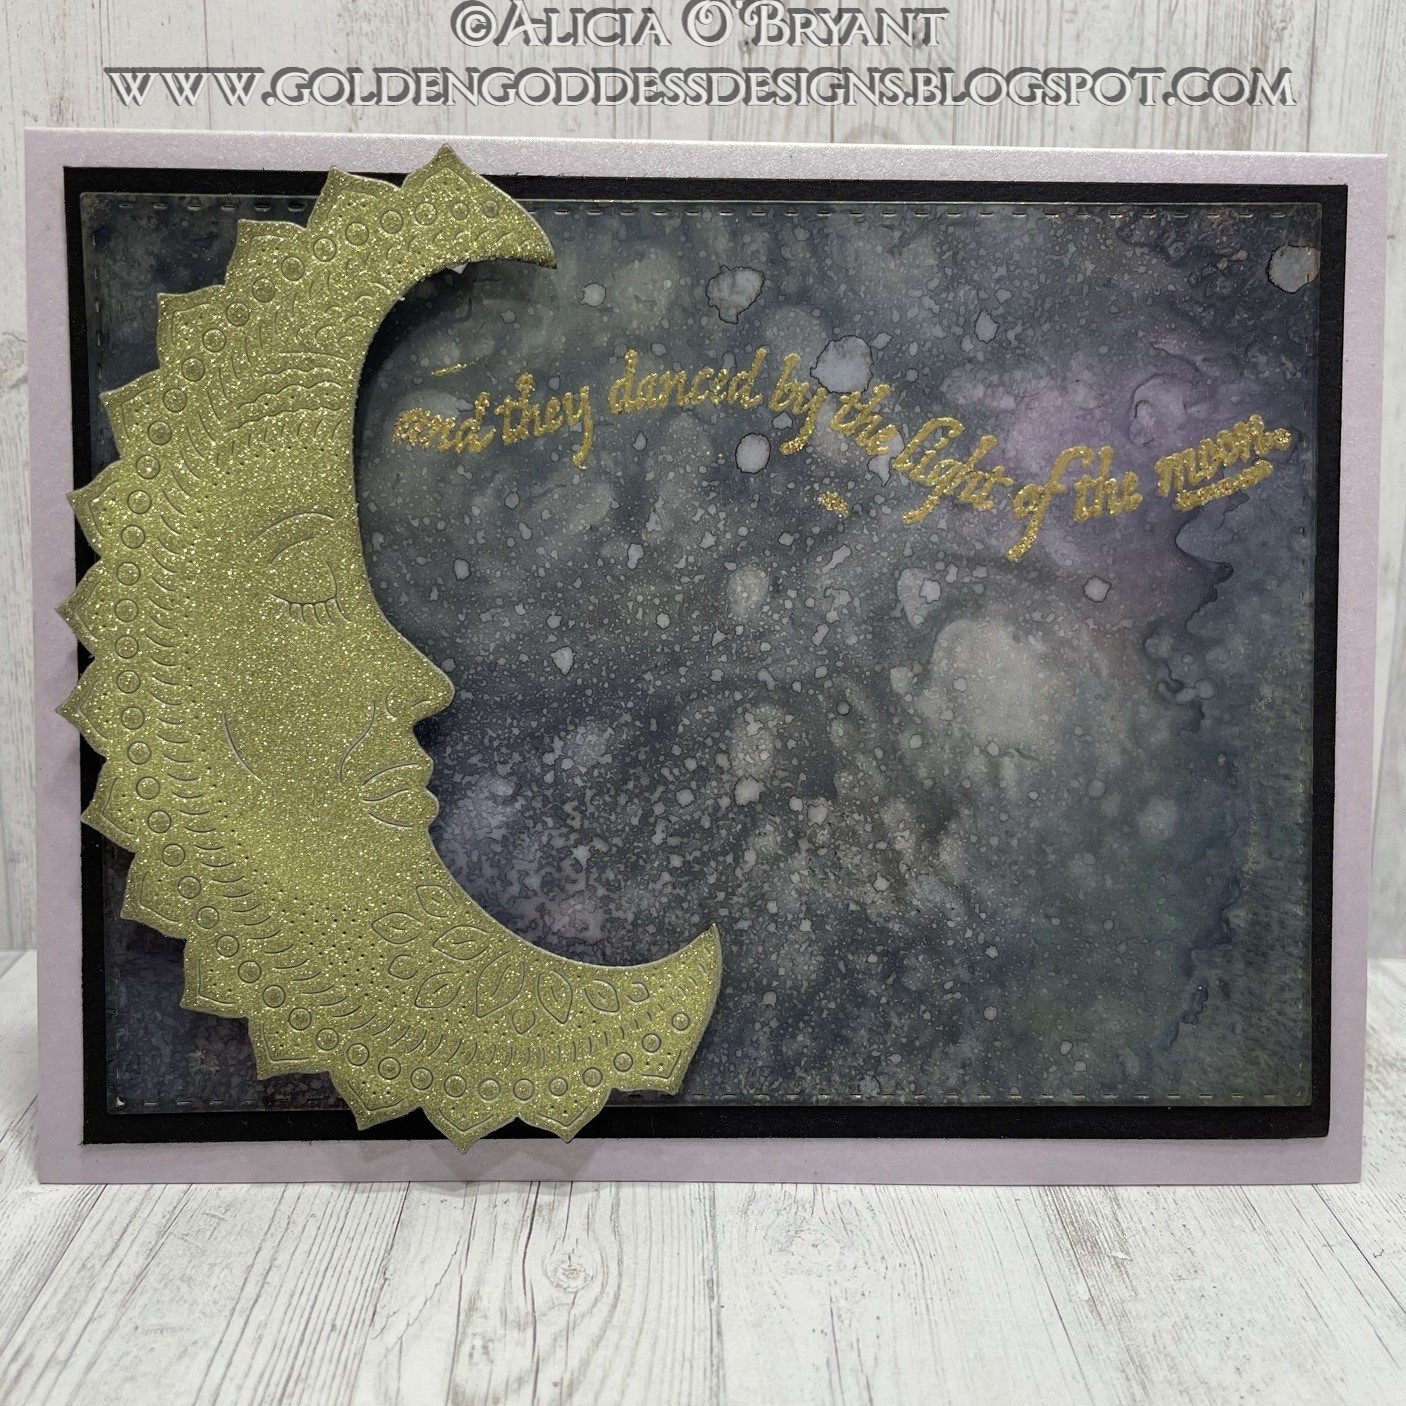
Here is my project.  Double Trouble asks that you tell them how many layers and trying to count, I believe there is more than 10!!  I die cut, inked, colored, stamped and fussy cut to create this scene.


Here are the details of the challenge. I added pearls to the center of the die cut flowers to comply with the twist.

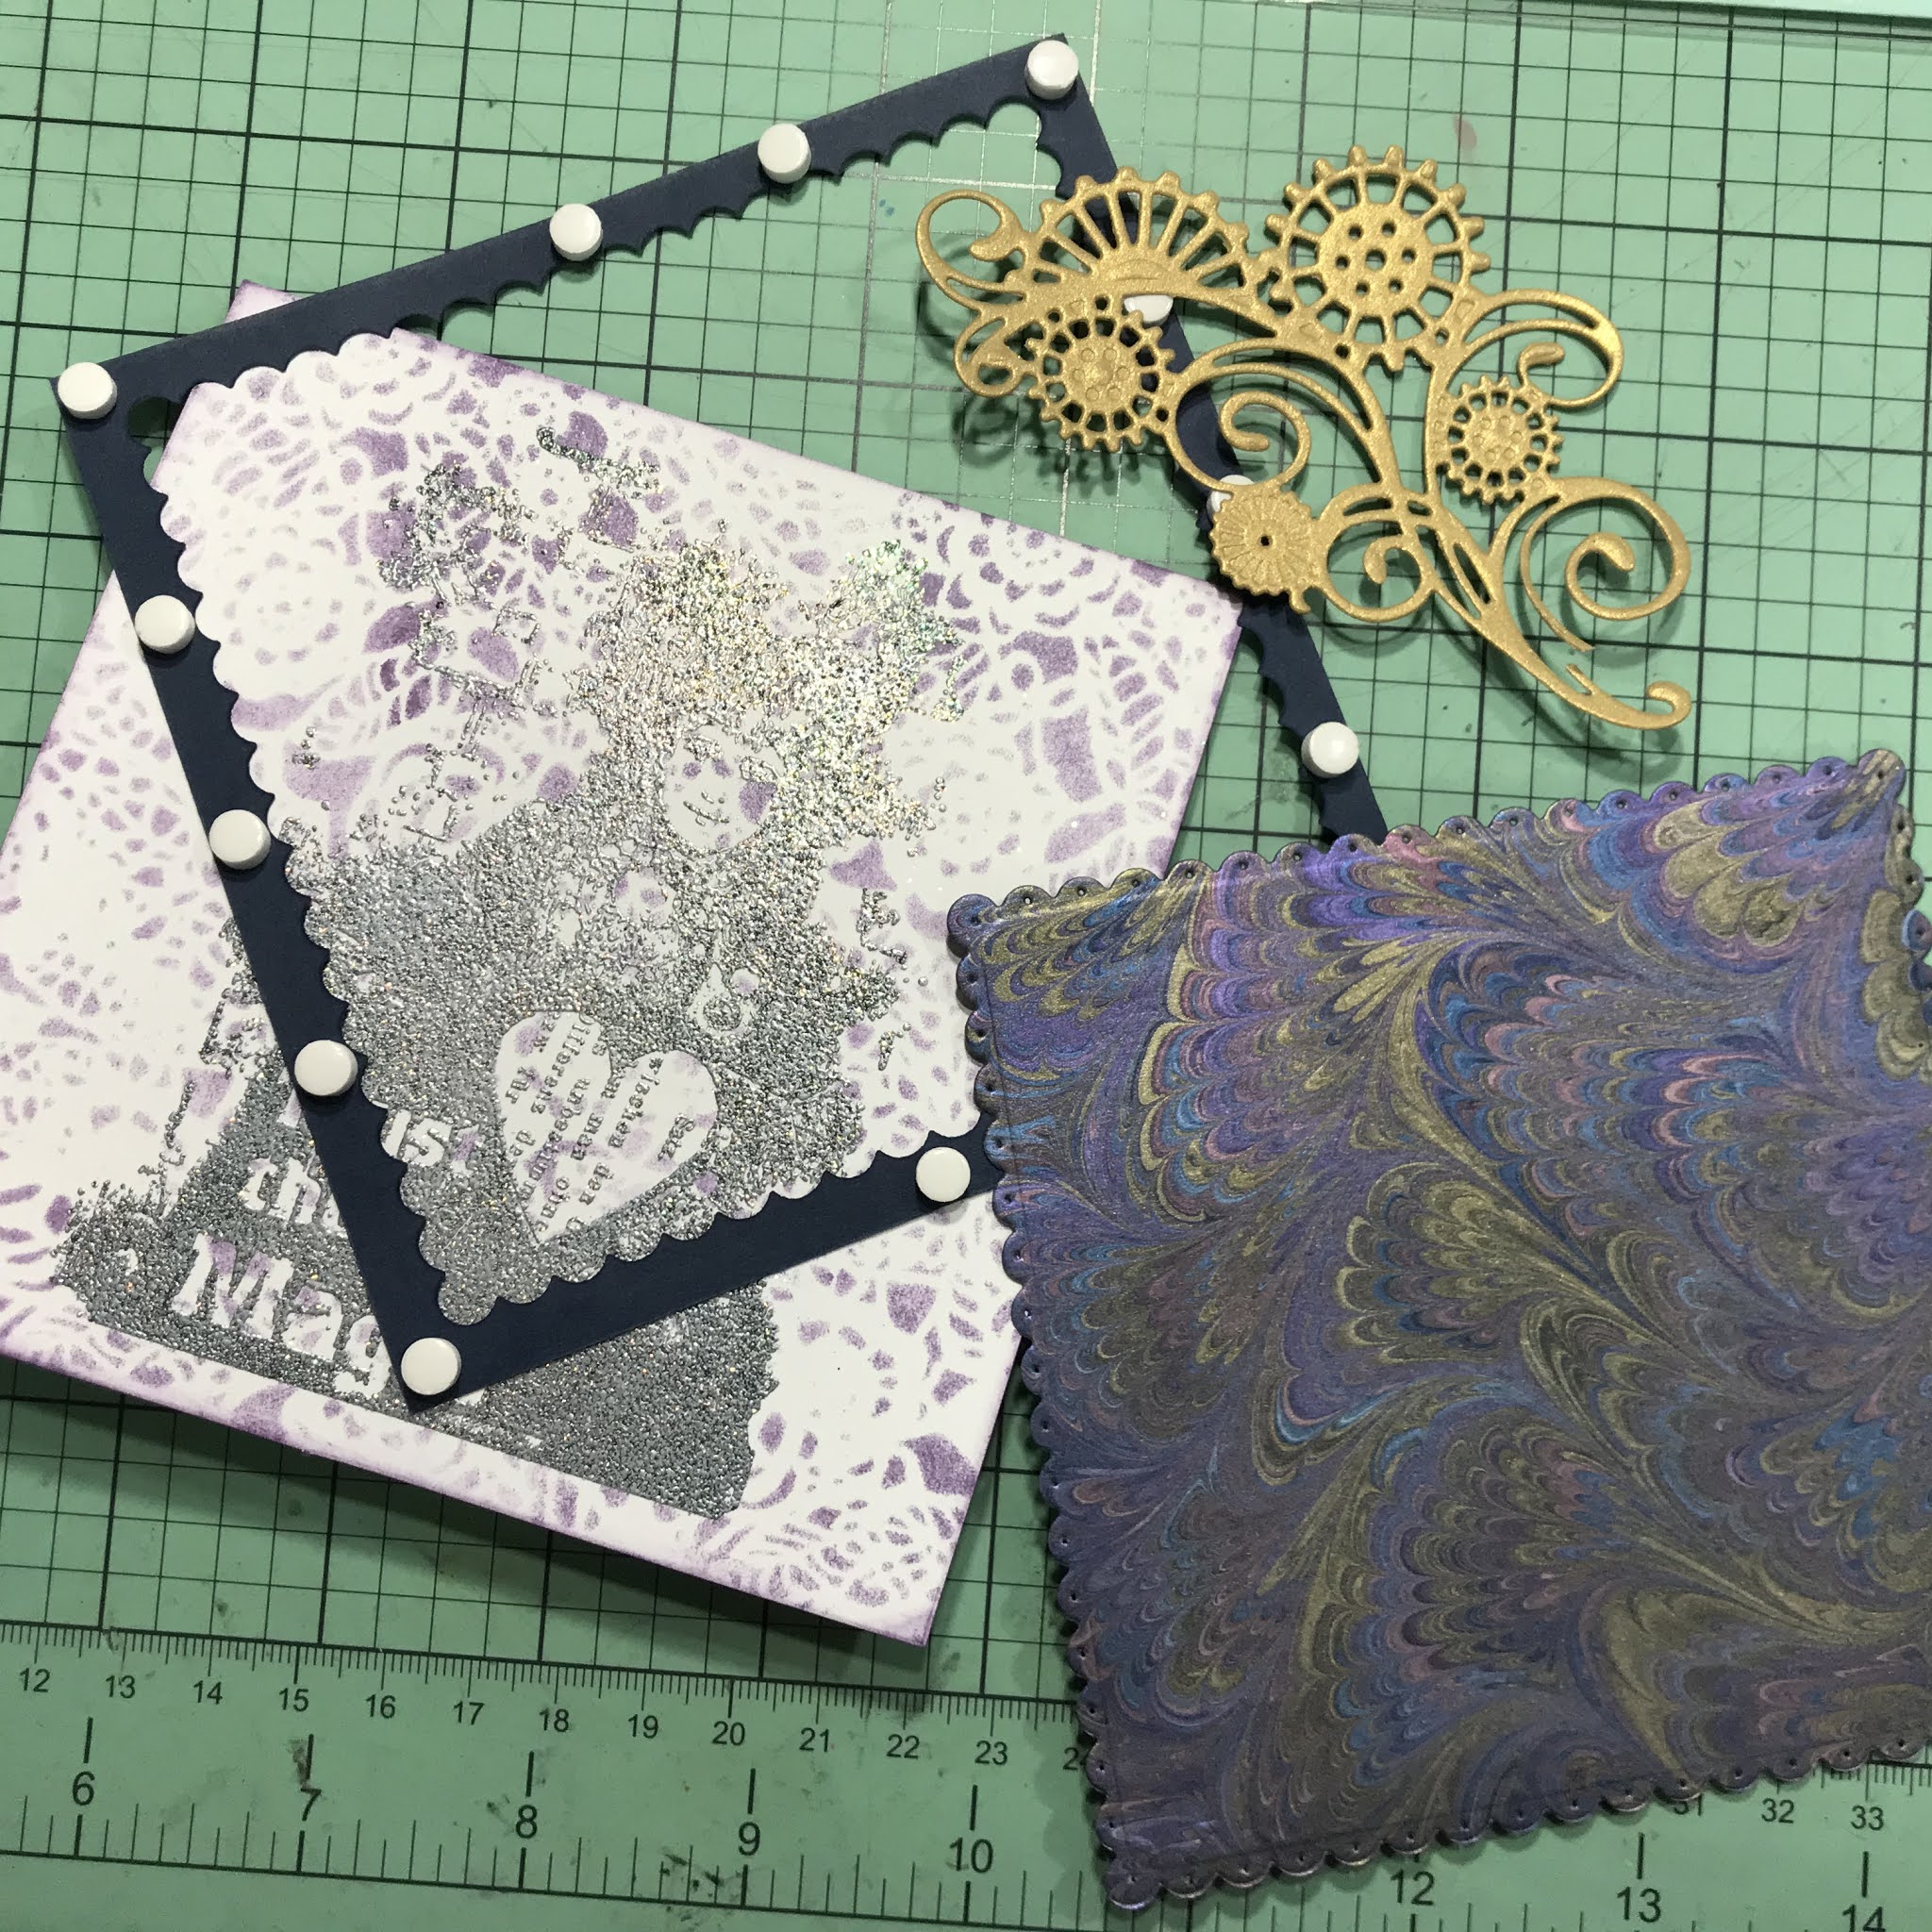
My card began with this layer. I created the folds and determined what sides would "show" and inked those pieces up with Distress Oxide Bundled Sage.  The center was die cut with the vine die so it didn't need to be completely inked.  The center panel is 5.5"x5.5" to fit the vine die cut.


Here is a side view.  I watched a video but because I die cut the front instead of making that side the back I had to make it work with my changes.  I don't know that I would make it this way again.  


One tip I took from the video was to reinforce the front panel with extra layers.  I die cut another half sheet of the vines and glued it behind just off center to create a shadow.  The bottom is reinforced with a thin layer of die cut "grass". I also glued the die cut layer with the fairy and mushrooms directly on the front panel.  I layered a die cut and inked pieced of grass which was 1.5-2" in height.  I added a drop of glue to the fairy's leg to provide support from the taller grass layer.  I also stamped a mushroom cluster on that layer.


I used Distress Oxide Forest Moss on the next two layers.  I dusted all the layers with green shimmer ink before assembling the card.  The trees are die cut and embossed from the same set and inked with Forest Moss.  The are not sprayed with shimmer ink.  I stamped flowers on the first hill layer.  The two hill layers are opposite sides of the die cut.


I colored the die cut mushrooms and fairy with alcohol markers.  I used Spectrum Noir shimmer alcohol on the dress, wings and hair of the fairy.


The back of the shadow box is a sheet of paper from the kit.  I also cut the flowers and purple vine from printed paper.

Ingredients:
Crafter's Companion Build a Scene box including dies, stamps, pearls and papers
Distress Oxide inks
Spectrum Noir shimmer ink pens
alcohol markers

I would like to enter this in the following challenges:


Don't forget to join in the challenge over at Double Trouble Layers Challenge until February 28.  Thanks for stopping by.

Alicia