Wednesday, October 23, 2013

Fantasy Brooch Bouquet~A labor of love...

I knew this project would take time but 35 work hours later, I call it a Labor of Love.  Of course, I had several friends who proved invaluable to this creation.  They donated brooches and other jewelry.  They helped twist all the pieces into flowers.  And finally a friend who worked at a florist during the summers of her college years help me arrange it.


My sister took some lovely pictures of it at the reception.


It is so heavy and the handle is so thick.  I have not found a vase or anything to hold it upright yet.


I started with various jewelry pieces, floral wire and white floral tape to create the flowers.  I watched several you tube videos before beginning.  I learned many helpful pointers such as using the thickest wire you can find.  In general, floral wire is thin and assist in making flowers hold shape.  Brooches are much heavier than flowers and I ended up making several "stems" at various points on the piece of jewelry and braiding them together to create one "stem" to hold the heavy pieces.  Another hint was not to use the "pin" on the back of the brooch, these open and close easily and could fall apart on you without warning if the closure accidentally disengages.  All the pieces are left usable again should you choose to disassemble the flower later with just a few snips with the wire cutters.   I intend to leave my bouquet intact and display it.


I ended up making 50 flowers and using 2 spools of silver wire (thicker of the two) and one spool of gold wire, and 2-3 packs of white floral tape.


Not all of my brooches ended up in the final piece.  As I worked on it and finalized my dress, I narrowed the "colors" to silver, gold, crystal and pearl.  There were a few colors, in the bouquet but I tried to keep with my chosen colors/theme.  I did use the abalone butterfly above but left out the copper piece.  As you can see there is a gold dogwood set of brooch and earrings above.  I used that one and several three pieces sets.  The key with all pieces is to have somewhere to wrap the wire securely on the pieces preferably in multiple points balancing the piece.  I used on "bunch" of ivory flowers from Michael's for the "inside" of my bouquet to hide the wires as I did not want a tight bouquet as I have seen in so many pinterest pins.  I also found 3 beautiful feather picks at Michael's. I searched four Michael's and never found anymore.  The bunch of flowers had greenery (leaves) which I left on and pulled the leaves off the bottom of the stem and inserted in the bouquet.


I also purchased this cone JoAnn Fabrics to help shape the bouquet.  I ended up tearing off the lace and putting my own gold tulle around the top of the plastic.  I also had to increase the size of the hole as brooch flower stems are very thick after using so much wire.


Some flowers after they have been wrapped but before the floral tape has been wrapped around them.


I tried to get a close up of where the pins are attached to wire.  


More "flowers", I used gold wire and silver wire depending on the pieces.  If it is a gold piece the gold wire blends with the piece, so you don't notice the wires.  


And the back of this set.


The brooch on the far right is my "something blue".


My friend wrapped wire through a broken pearl necklace and made this lovely spray.  I thought the colors were very close to the abalone, so I asked her to add it to the top.  As you can see it ended up in the front bottom of the bouquet. .


A pieces she gave me that started as a bracelet.


                                      A set I purchased for the bouquet at a resale shop.


More pieces these have been wrapped in floral tape to cover the wire and add uniformity.


A brooch I wore regularly in the 1980's.


A "1929" enameled dragonfly.


Rhinestone pieces: brooches, a shoe clip, earrings and clasps.


My friend also wrapped loosely some rhinestone bracelets that are in the bouquet.
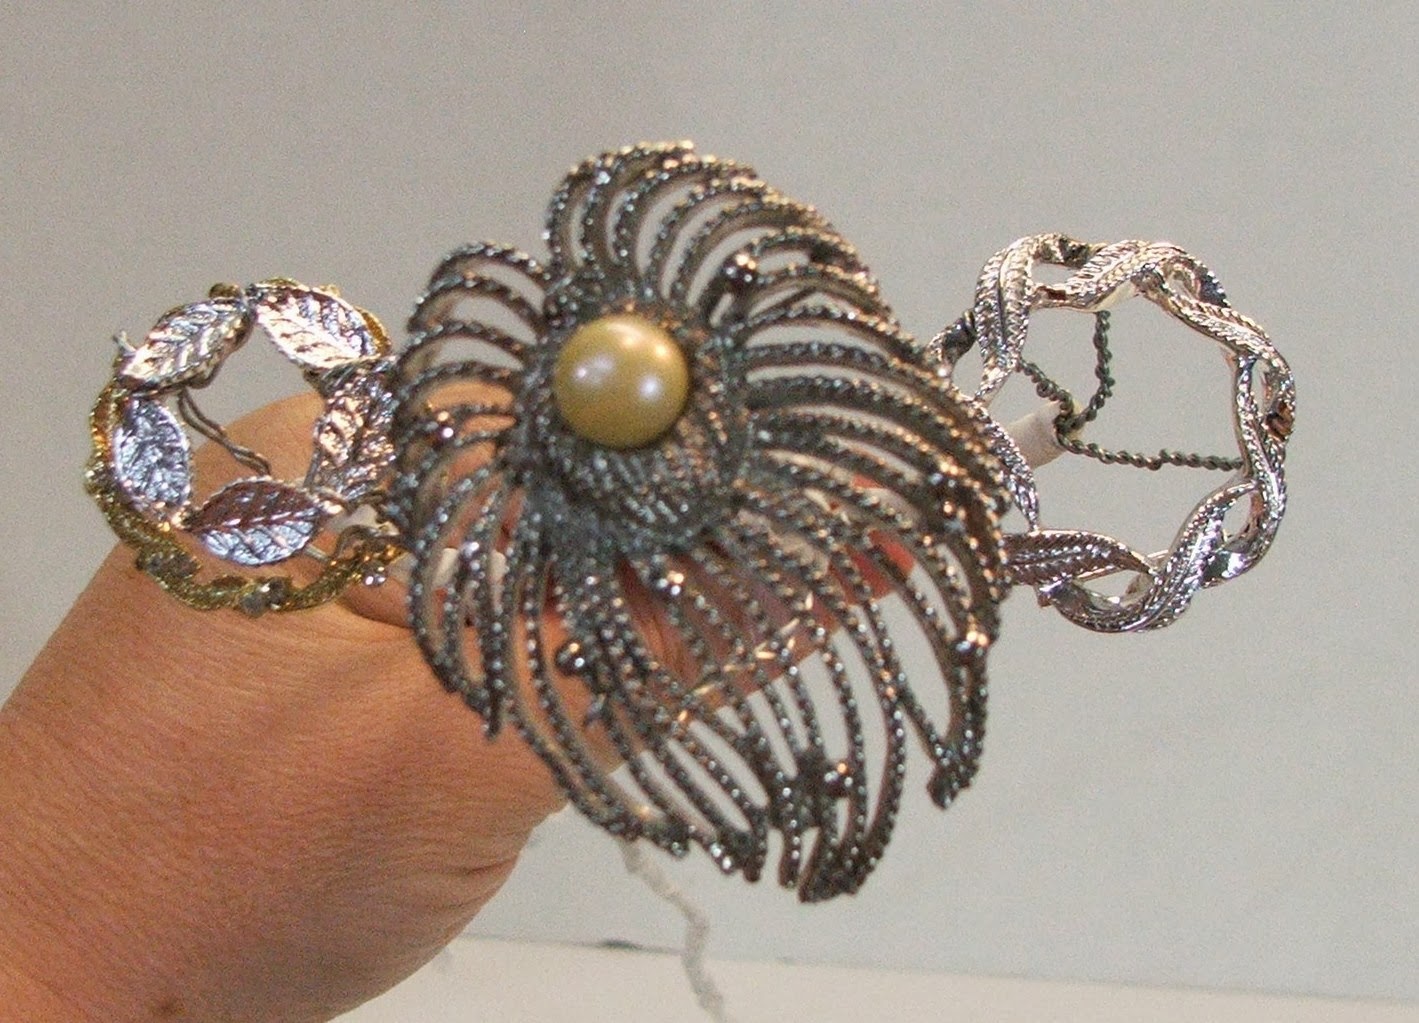

These are all pretty old pieces that I have had in my collection for a while.  My grandmother immediately recognized the center piece as an old Avon brooch that she gave me.


More pieces:  You can see with as much wire as I used the heaviness is still obvious in leaning flowers.


There is a sterling silver ring and a broken barrette.


The bracelets stand up well with just a couple of wire but you still want them to be flexible!


Here's the centerpiece, a gift from a close friend who also helped wrap some flowers.


What a project.  One of those that I will not be duplicating!  Thanks for spending some time reading my blog.  Have a blessed day!

Thursday, October 17, 2013

Breast Cancer Hope ATC Swap for Kraftie Kre8ations

In this series of ATC's I created 10.  I needed 6 for a swap and I am using the last four for another Breast Cancer Awareness Project this month.  Both part of Kraftie Kre8ations:  http://www.kraftiekre8ations.com/


I have this beautiful TCP hot pink shimmer paper which I used on most of the cards.  I also used the Creative Memories Think Pink embellishment packs on most of the cards.  I had to add some bling and highlight with a sparkle pen.


This one also has some Creative Memories Fabulous Paper Flowers and white rick rack.


This one has some printed tape.


Queen and Co bling and velveteen brad.  I painted this pale pink card with a light gloss with Pearl Ex duo red/blue which has a pink hue.  I also used the Creative Memories pink ribbon punch.


American Crafts twine, CM Fabulous Paper flower and a beautiful brad.


I love the hot pink fiber with the CM epoxy think pink embellishment!


Lots of fiber and bling on this one.


A little different with the doily and CM shape maker circle tag punch.


Pearl paint.  


I didn't include a close up pic of the "cure" one because it was missing some bling, I did not discover until I was putting this set in the mail for the swap.  I did replace it before it went in the mail and later I found the one pink crystal stuck to me!

I am entering this in the following challenges:


Thank you for reading today!

Sunday, October 13, 2013

Girl Power Pink Kraftie Kre8ations Challenge

This months Kraftie Kre8ations Design Team challenge was to alter a box and gift it to someone who has or has lost a loved one to breast cancer. http://www.kraftiekre8ations.com/2013/10/boxes-of-hope-girl-power-pink.html


This would be my new mother in law "Lulu",  She lost her battle with breast cancer over a decade ago before I was part of the family.  I found the picture in my fiance's boxes of photos that I am trying to organize and scanned it.  I gave this to my new sister in law on my wedding day.


I have filled it with Breast Cancer Awareness ATC's and a Breast Cancer Awareness bracelet that I also created.  The bracelet is made with porcelain beads with pink ribbons and vintage czech glass beads with an iridescent finish.  The box is decorated with Creative Memories Think Pink embellishment kit.  I taped and glued paper ribbon on the outside of the lid and the inside of the box.  I also used a Stampin Up heart doily in the inside.  I used glitter glue around the edge of the lid and a beautiful new sparkly brad I just purchased at Michael's.


I decorated the inside with more Creative Memories Think Pink embellishments.  The ACT's also use the CM Think Pink kit plus The Paper Company pink shimmer paper, bling, brads, doilies and various fibers and ribbons.  The paper flowers are from CM Fabulous Power Palette.


I used the CM shape maker circle tag punch for the top left ATC, punched from old CM pink swirl paper with a Wilton doily.  


My sister in law devotes a lot of time and energy to breast cancer awareness.  I hope she can pass on the ATC's to those in need.  I make and sell the bracelets for $25 with $10 going to the Susan G Komen foundation, if you would like one please contact me.  Each bracelet is a little different.  Thank you for reading.

I am entering this project in the following challenges:


Thursday, October 10, 2013

I am a winner!

Just a little update!

I won the Toxic Spellbook Blog Hop prize of two past housecall kits.   Madge seems to put some great kits together!  check out her blog:

http://www.heartstringdesigns.com/

I was also chosen for the Sunday morning HOT SEAT this week on Kraftie Kre8ation's blog:

http://www.kraftiekre8ations.com/2013/10/sunday-morning-hot-seat-alicia-obryant.html

Plus I am the Honor Sister of the week on a Facebook group to which I belong!  Wow and to top it off I am getting married the Saturday!  Lots of work still to do!  Have a great day!


Sunday, October 6, 2013

Mad Hatter Blog Hop using Graphic 45 Halloween in Wonderland

Welcome to the Mad Hatter Blog Hop

Today is Mad Hatter Day!
And we are here to wish you a VERY HAPPY UN-BIRTHDAY!! We are so glad you decided to put on your craziest hat and join us for the maddest tea party around while you check out this great group of crafters who will be showcasing cards, layouts, or projects all about the magical world of Alice in Wonderland! Hurry up and don't be late for this very important date!!

Connie Can Crop is the first stop on this funtastic Blog Hop.

This is a one day blog hop and we appreciate your leaving a FUN comment for all of my fabulous crafty friends who are here sharing their ideas and creations.  


We have an awesome sponsor and giveaway for this hop!


Designs on Cloud 9 is giving away a $10 gift certificate to one lucky winner!! 
You can shop their store here.
And even like them on facebook for more fun.


  So what do you need to do to win? Easy... become  a follower of each of the fabulous blogs in this hop and leave each of them a  comment letting them know what you like best about their projects. 

Then come back to Connie Can Crop and post that you followed the rules.

 You will have until 12:00 am Monday to finish the  hop and leave your comments. Winner will be announced on Wednesday Winners at Connie Can Crop.


Be sure to follow everyone and leave a comment  along the way!


 Here we go down the rabbit hole!!


I used the Graphic 45 Halloween in Wonderland pad with diecuts for this project.  I also added a Jolee's embellishment and a metal charm.  The red glitter letters are Martha Stewart and I am unsure of the glitter flowers and bling.


Close up of embellishments


I used glitter glue to enhance the mad hatter diecut.

Last year I did a similar piece for the same friend, here's a picture and a link to that original post (early in my blogging days):


I am entering the in the following challenges:


Saturday, October 5, 2013

Crazy for Cricut and Creative Memories Blog Hop


Welcome to the Crazy for Cricut & Creative Memories Blog Hop!  You should have arrived from Clare's blog:  http://www.cricutcraftyclare.blogspot.com/.  

Today I have a project created with the Creative Memories Divine Wedding cartridge and the Close to my Heart's Artiste cartridge to create the box.  I created this box to hold candies at my wedding next weekend.  I have used The Paper Company golden shimmer for half the boxes and Recollections ivory shimmer for the other half.  I used the opposite paper for the "happily" layer and TPC blackberry shimmer for all the "ever after"s and the hearts.  I spent a while experimenting with the best way to assemble the boxes.  First I used a bone folder to score the boxes.  I used glue to glue the blackberry layer to the happily layer.  I used a glue runner and a glue pen to adhere the happily layer to the box.  I then assembled the box and used a couple of glue dots on the inside flap to hold the side of the box in place.  The boxes will be holding candy!  Continuing with the "happily ever after" theme, I acquired some ribbon at Michael's which says "and they lived happily ever after".  It was enough for the bubble bottles but not quite enough for the personalized kisses bags.  I am still experimenting with another ribbon to finish those.  


You can really see the shimmer in this picture:


Here are those bubble bottles:


 This is the side of the box during assembly:


The glue dot is on the other side of the tab also keeping the tab secure.

I also used the CM Divine Wedding cart for my wedding invitation.  This project has it's own post:


but here is another pic:


If you enjoy my wedding projects be sure to check back in just over a week for my brooch bouquet reveal!


I am entering this project in the following challenges:


Next up is Lori: 

Thanks for stopping by!  Be sure and leave a comment to be entered for Clare's blog candy!!

Here's the entire line up:
Golden Goddess Designs at: http://goldengoddessdesigns.blogspot.com/
Scrappin' My Stress Away at: http://scrappinmystressaway.blogspot.com/
S.C.R.A.P. Guild of Northern IL at: http://scrapguildillinois.blogspot.com/


Thursday, October 3, 2013

Up and Coming! Wedding, Cricut & I am a winner!!!

Good morning dear readers!  I wanted you all to know that I am crafting even though I haven't been posting as much.  I am working, working, and working some more on wedding crafts.  I have finished my brooch bouquet but I don't want to reveal until after I carry it down the aisle. I am working on goody boxes which will be part of my Cricut and Creative Memories blog hop this weekend.  I have worked on a few other projects that I will post while I am away on my honeymoon.  So be prepared to see more non scrapbooking projects and wedding themes.  I do have a few other post planned involving Breast Cancer Awareness month as well.  Here's a sneak peek at some of the things I have been working on:

Prototype of my goody box


Centerpiece of my brooch bouquet.

Also I recently won The Paper Loft Guest Designer job for November!  

Friday, September 27, 2013

Kraftie Kre8ations September Pooh Bear Project


This is my project for the Kraftie Kre8ations Design Team for this month.  http://www.kraftiekre8ations.com/
September is National Honey Month and who better to spread the word about honey?  Pooh bear!  I had to dig out some old photos of my son in pooh attire.  I found quite a few but I just loved the expressions on his face in these pictures.  I cut the title quote by pooh "that buzzing noise means something" from Creative Memories Cricut cartridge Stork's Delivery and the sugar and spice font.  I used CM chamois and periwinkle card stock for the letters, to mat the photos, and to match the pooh diecut which is also CM.  The layered accents are EK Success Disney Classic Pooh.  I loved the subtle sparkle to them.  I accented this by using my Sakura Gelly Roll pen in Clear Star to outline almost everything on the page!  I also outlined the pooh diecut with pencil with reminded me of the sketchy look of the paper by Sandy Lion, Pooh Colorful Squares.  I chalked everything too, with Martha Stewart's Meyer Lemon chalk and Versa Magic Aegean Blue.


Close ups


I had to look back to date the original pictures and this is my original scrapbook page of these photos.  True Creative Memories style circa 2001!


All CM product except for the pooh stickers and title sticker.

Thanks for stopping by and be sure to check out our Facebook group:
AND leave a comment on http://kraftiekre8ations.blogspot.com for a chance to win blog candy!


Now onto the First Day's Blog Hop line-up:


1ST Day

Begin Here http://www.kraftiekre8ations.com/

Shavon http://scrappingvon.blogspot.com/

Carolyn  http://grandmacarol46580.blogspot.com/2013/09/a-design-team-challenge-at-kraftie.html?spref=fb

 Alicia  You're HERE

 Kisha  http://www.iamartserae.blogspot.com/  NEXT

Back to Here http://www.kraftiekre8ations.com/

****

2nd Day of Hop: 

Begin Here http://www.kraftiekre8ations.com/

Meka

La-Vie  http://cestla-viedesigns.blogspot.com/

Lyne

Paula

Back to Here http://www.kraftiekre8ations.com/


Wednesday, September 25, 2013

Sketch n Scrap Card Sketch # and Pretty Pink Posh 10 minute challenge card


Here I used a Wilton doily, The Paper Loft paper Shades of Gray gunmetal and Flip Flop Breeze.  The sentiment is also from The Paper Loft's Flip Flop collection. The strips are scraps from the cranberry, breeze and gunmetal papers.  I used the Creative Memories small heart punch to punch the hearts out of cranberry cardstock from Recollections.  I finished it off with various chalks of red and blue.  This one only took 9 minutes and 3 seconds!

I am entering this in the following challenges:

http://www.sketchnscrap.blogspot.com/2013/09/card-sketch-10.html


http://prettypinkposh.com/2013/09/10-minute-craft-dash-26.html


CD_26