Tuesday, September 29, 2020

Autumn Blessings card for Atlantic Hearts Sketch Challenge

Welcome to my inspiration for the latest Atlantic Hearts Sketch Challenge.  I dug deep in my stash for the components on this one.  These stickers are easily twenty years old!  I hope I gave them an up to date feel with the metallic ink and card stock with sequins.


Here is this week's sketch:


Here's another view of my card.  In this one you can see the sheen of the metallic copper card stock.  Neither pic captures the beauty of the printed paper behind the squares. 


I was at my sister's back in August and she had some old books and catalogs to purge.  I didn't really need any of them but this old Mrs. Grossman's catalog I just had to take!  Here's the pic of these stamps from the original catalog.


Here's the cover of the catalog.  Let me know if you remember this?!?!?


Sticker sheets still in the back!  Very nostalgic.


Ingredients:
Mrs. Grossman's stickers
Spellbinders Nestabilities Decorative Elements Lacey Oval die
Spellbinders Classic Oval die
Sara Davies Signature Autumn Morning sentiment
Brilliance Cosmic Copper ink
Metallic card stock
Stampin Up confetti paper
misc papers
sequins

I would like to enter this in the following challenges:


http://daringcardmakers.blogspot.com/2020/09/s-for-september.html (stickers, Spellbinders x2, Sara Davies, Stampin Up, sequins, scalloped edge, and sketch) until 10.2 jff


Don't forget to play along with Atlantic Hearts Sketch Challenge
Atlantic Hearts Sketch Challenge

Thanks for stopping by

Alicia

Monday, September 28, 2020

Wicked Halloween with Bitten By the Bug 2

Welcome to the latest challenge for Bitten by the Bug 2~Halloween.  If you are a frequent reader of my blog, you may have noticed I am thrifty.  I hate waste.  Sometimes Cricut cuts produce very usable negative cuts.  As is the case with today’s cards. I cut the original and noticed the negatives could be used for a second card.


I added pearls to the boots for a little detail.


There’s a couple of determinants for whether a negative is usable or not.  The number of pieces, the necessary layers and the overall cohesiveness.  I decided these negatives would work.  The only thing “wrong” is that witches’ boots are typically black.  When I asked my husband if he could tell the difference, his response was that the layers were reversed. 


A tip is to use the original cut as a template for paper placement before creating the “original” card.  Everything is then perfectly placed. 


I am always happy to get two for one!  


Ingredients:
Cricut Creepy Critters images
misc papers
pearls

After I completed these I found some Pinterest ideas that simply involved slipping a different piece of patterned paper under the boots and flourishes. It really gave it a lot more pizazz and I will try that next time.

I would like to enter these in the following challenges:


Don't forget to play along with the Bitten by the Bug 2~Halloween until October 12.

Thanks 

Alicia

Friday, September 25, 2020

Judikins Mica Gloss background thank you card

Hello and thank you for stopping by my blog.  Today I am using some pieces from my stash.  I had this background using Judikins Mica Gloss which I die cut and layered with some other pieces and parts from my stash.  Sometimes I cut pieces I don't end up using.  I have a pocket of circles, one with ovals, rectangles, etc.  I try to use these pieces whenever I think of it.  The stamped sentiment is also from my "made but didn't use" bin.  The image is a print that I fussy cut.  I inked all the edges.


I simply added a few drops of each color of mica gloss and smooshed together.  This one is the last lift of ink off the original press.

Ingredients:
Judikins Mica Gloss:  Green, Peacock and Old Gold
Frantic Stamper rounded corner rectangle die
Our Daily Bread Designs Double Stitched Circle die
The Paper Company Thank you value pack stamp (at least 10 years old)
Distress Ink Fossilized Amber
printed image
misc card stock

I would like to enter this in the following challenges:


Thank you for reading today.

Alicia

Saturday, September 19, 2020

The bus came by and I got on...another German Bus

After my first attempt at the Bitten By the Bug 2's Life in 3D challenge.  I thought I could do a better job at my bus and I had a few other ideas to improve upon the first one.  I also had a friend in mind, he was suffering from cancer and I thought this trinket box might brighten his day.  Luckily he did receive this a few weeks before he ultimately succumb to the disease. He passed one week ago today. 


I have him as shotgun and our favorite musician driving the bus.  I added the band logo on the front instead of the peace sign cut that came in the set.  I had a time getting the logo to print at a good size to fit in this area.  I again added gems to the headlights.


I filled the bus with our friends.  It took a while to find proportionate size photos to fill the windows.


I put my crew in the back of the bus.  Most of the photos are from our annual vacation to see the band.  I printed and cut more of the "sticker" images and used one as the license plate.


Here's the box open.


Another friend created a video featuring music and photos of my friend.  Here is the youtube LINK. The "Island Express" bus is featured at 1:50.

 Ingredients:
Cricut Maker
DCWV Tie Dye stack
misc card stock and papers
gems

I would like to enter this in the following challenges:


Don't forget to play along with Bitten By the Bug 2's Life in 3D challenge until 9/28.

Thank you for stopping and tell someone you love them today.

Alicia


Friday, September 18, 2020

Craft Room Clean Up

I invited a friend over to craft for her birthday.  Only my room was a mess and could not hold her and her daughter.  Goal set, I had to make room for us to craft.  Once it was this clean, I had to take photos.

As you first enter my room and turn to the left you will see this stack of stamps.  I have themed bins of assorted brands of stamps (pink) with a few bins of papers (green).

I also have comic book boxes of stamps.  I have organized my stamps that I removed from the wood blocks in pocket packs.  I recently purchased a lot of stuff from a huge craft room and I got to take the paper home in the plastic file boxes in the photo.  I organized specialty 8.5"x 11" papers in them.

Here's the view into my primary area.  One of my favorite newer purchases is the table top for my cart.  It was $10 on sale at Micheal's.  I store odd size ink pads inside and use the top for my laptop.

Unfortunately, I broke the wheel off this cart during my clean up.  This is the second one I broke both of which were purchased at Sam's club.  I haven't had any problems with my Michael's cart.  My husband says I try to fit 10 lbs of stuff in a 5 lb container.  I did organize all my pre cut cards on the top shelf and card/envy sets and special fold card bases on the bottom.  

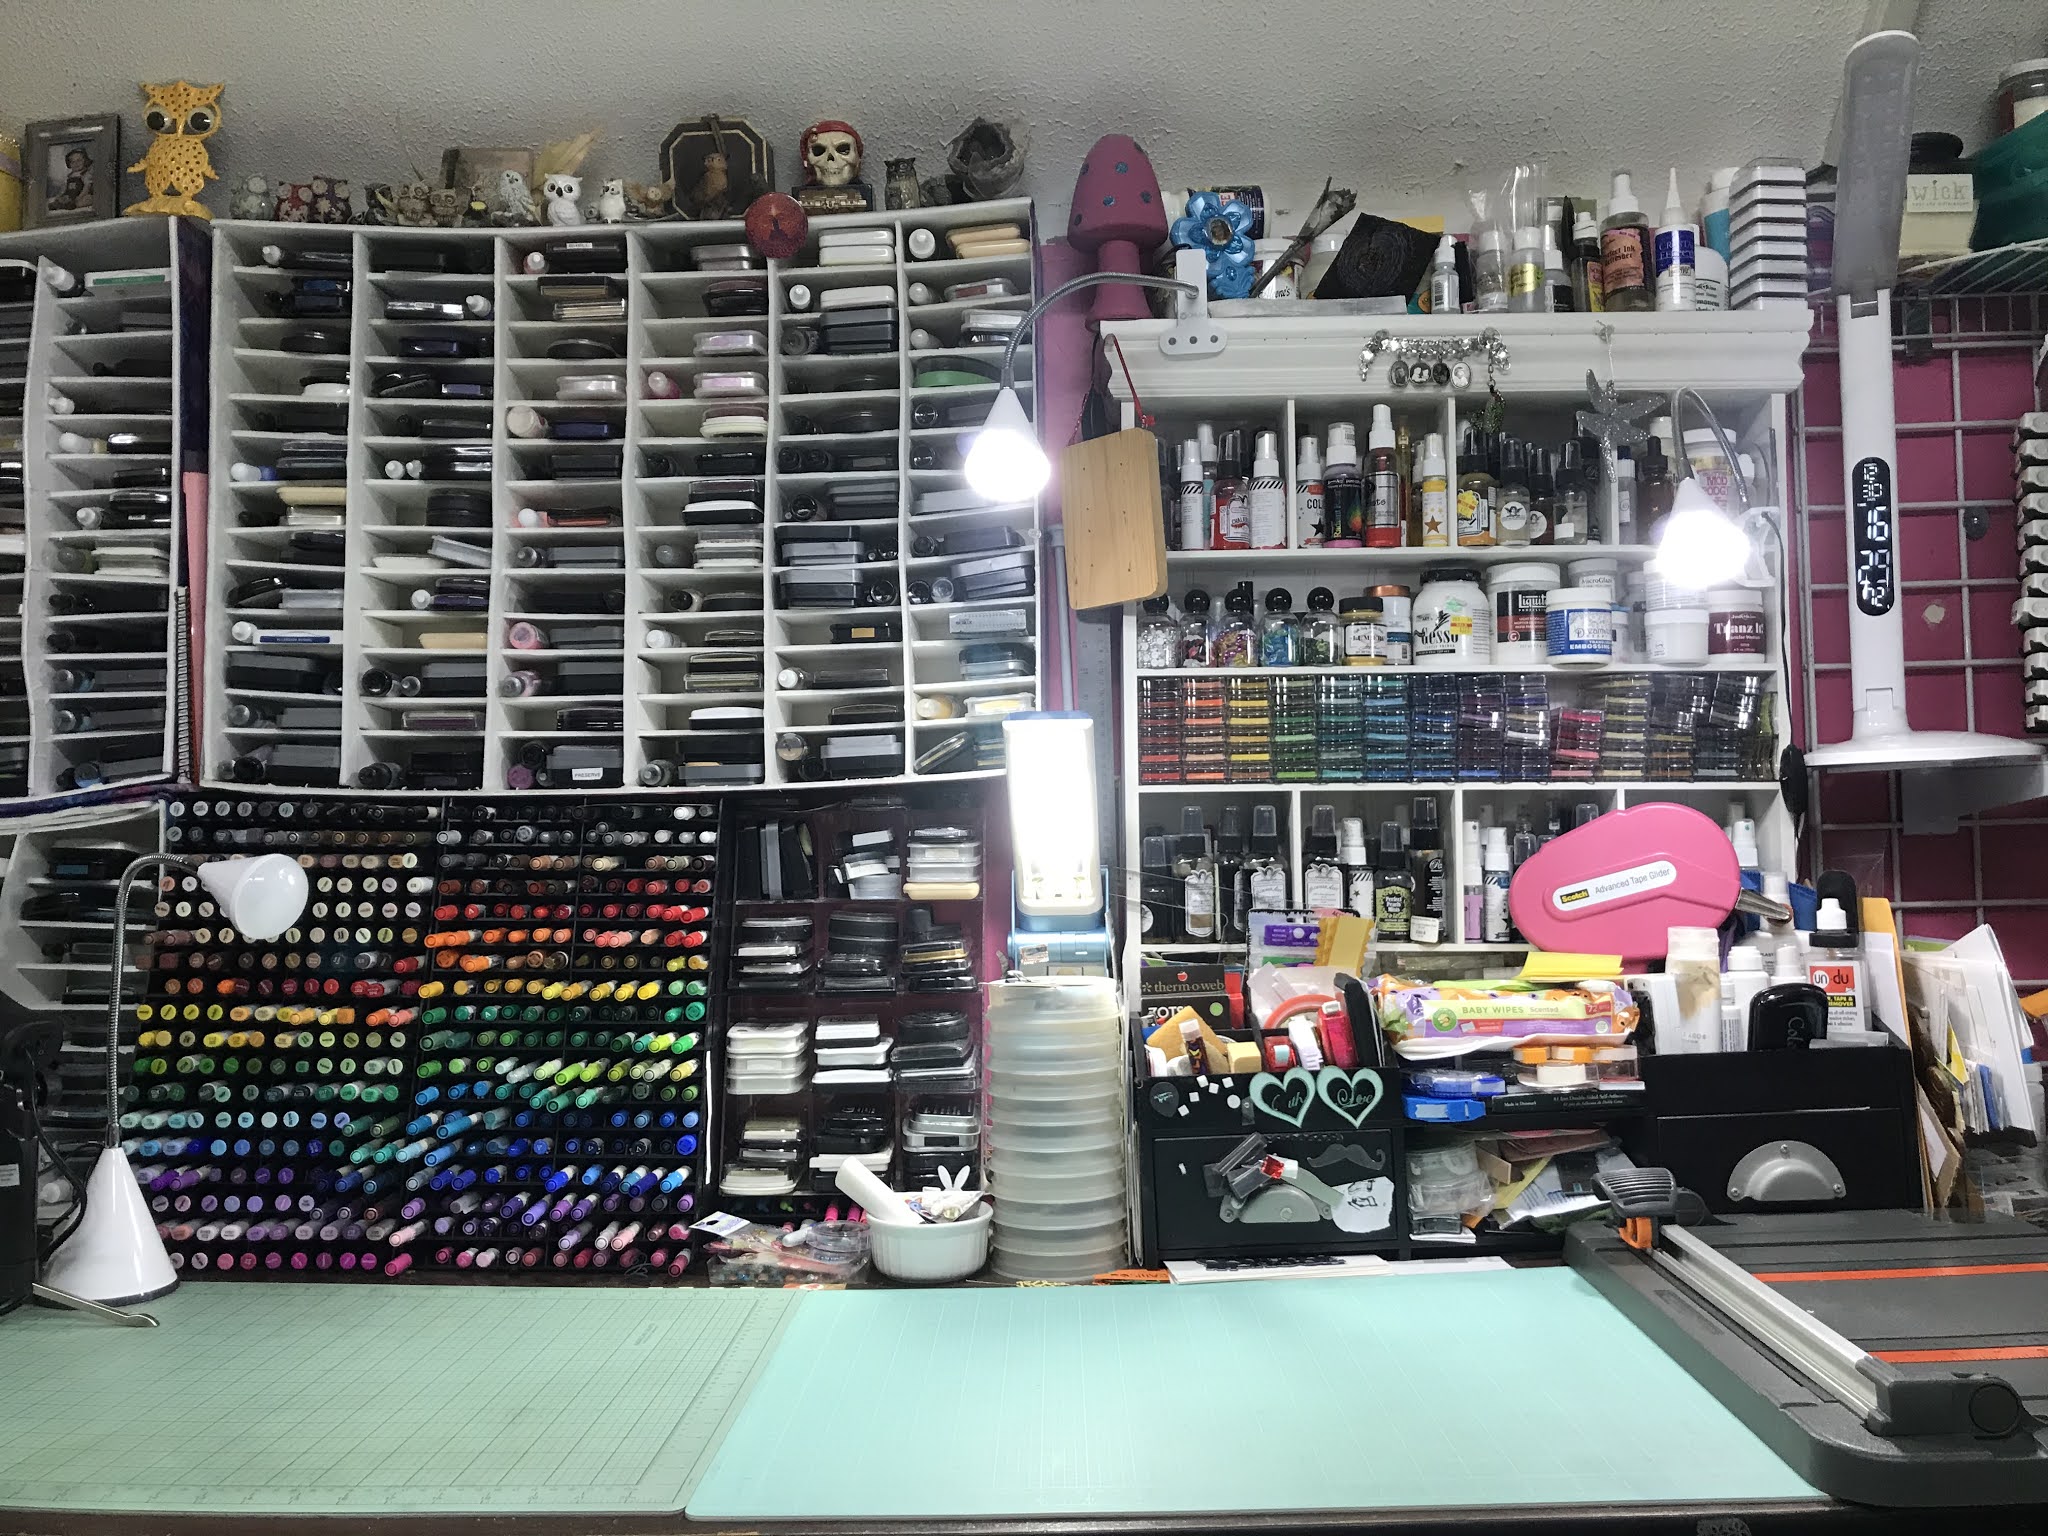
View from my primary seat.  My pens are within reaching distance as is a stack of black, white and gray ink pads.  I also have a desk caddy with adhesives, cleaners and random clear blocks.  My paper cutters are on the right hand side.


I also have my card stock handy.  More comic book boxes with Stampin Up stamps and two on the right are full of thin dies. I also keep my Creative Memories cutting system and border maker handy (bottom of photo).


My second cart is a bit larger and sturdier.  It came with pen holders and a peg board side.  I store small paper packs on top and embossing powders and accessories on the bottom two shelves.


Straight back from the door are my rainbow papers and embellishments.  In this corner are my Cricut, printers and beads.


A closer look at this desk.


Underneath this desk, more beads, Cricut mats and collage materials.


The next desk area contains my scrap rack, finished cards, envelopes, extra inks and refills.


The final area is the manual die cutting cart.  I covered an old cart in duct tape.  I have machines on the top, a Sizzix Big Shot and Spellbinders Grand Caliber.  I store magnetic movers and shapers around the inside of the cart  and thin die basic shapes on magnetic sheets on the wall behind.  I also have my Kiwi Lane templates on a rack behind the door.


Below I have my large Sizzix dies and embossing folders in the old Creative Memories storage binder.  They fit great in the 4 pocket style page.  


I have some larger collections of themed papers that don't fit in the scraprack underneath on the other side of my cutting cart.  The themes include animals, food, sports including an entire soccer section and Xmas papers.


This corner has more Micheal's cubes and a set I purchased on Facebook market place (blue drawers).  I have my Graphic 45 papers and other paper collections over here.  Along with Sizzix alpha dies and miscellaneous odds and ends.


Of course, there is more crap in the floor back here, duct tape, coloring books, and extra envelopes are in containers.  I have extra scraprack and storage pages in a black CM bag in the floor.  My over the door storage has shimmer powders, paint brushes, glass marbles, some papers and glitter glues and pearl drops.


Another view from the door.


Now during the clean up, I had to move lots of boxes of stuff to my husbands room to make room for my friends to craft. These stacks are composed of duplicate items to sell, stamps to remove from blocks, and stamps and product to add to my Evernote files before adding to my stash.  I will say there are a ton of cd's behind my stacks so my stuff does NOT fill this entire corner.

Thanks for bearing with me through all the photos of my craft room.  It rarely gets this clean.  I am trying to keep boxes and papers off the floor.  I must admit it feels really good to walk up the stairs and between rooms without  boxes in the way.  However, I will say I have already needed a stamp in that stack.  I just did without it but I must move the stack of stamps to be removed from wood back to my room.

Alicia


Wednesday, September 16, 2020

How to Make Drawers for your Michael's storage unit

I recently accomplished a deep clean of my craft room.  I have a couple of the cubes below from Michael's.  I turn them both directions for various items, however, I desired to get the items easily from the back of the cubbies so I thought I would make some drawers.

Here are the drawers I made for the small cubbies.  To make your own, you will need 2 - 12x12 sheets of thick card stock, strong adhesive and a knob or pull for each drawer.

  1. Score sheet #1 at 2.75" on each end or 2.75" and 8.25" (short side)
  2. Fold on score lines
  3. Cut sheet #2 (uses entire sheet)
    • 12"x4.5" - 2 pieces
    • 12"x1.5" - 2 pieces
  4. Score 12"x4.5" pieces at 2.75" on each end or 2.75" and 8.25" (short side)
  5. Score 12"x4.5" pieces at 3.75" lengthwise leaving a .75" strip
  6. Add adhesive to the 12"x1.5" strips and add to long sides of sheet #1 to desired height
  7. Add adhesive to the center .75" strip and align along open end of sheet #1 
  8. Prefold the corners against the sides of the box, I found the fold naturally fell into place
  9. Add adhesive to the entire side panel including the inside of the folded corner
  10. Don't forget to put adhesive on the outside strip of the fold
  11. Firmly press the adhesive and smooth out the corner.
  12. Repeat with the last piece of paper to complete the box shape.
  13. Finally, poke/punch a hole(s) for your pull or knob for the front of your drawer

Here's the entire cube with my two new drawers.


Here is the junk I stashed in my drawers.  Ribbon and other bits and pieces that don't have a place in my craft room yet.


Blenders and handles I access frequently in this drawer.


Ingredients:
DCVW Metallic Pink card stock
Scoring tool
Scotch ATG Adhesive gun
crystal knobs

I will be posting pictures of my very clean craft room in my next post. Be sure to subscribe and thanks for stopping by today.

Alicia