Showing posts with label #specialfold. Show all posts

Tuesday, December 16, 2025

Pink & Main Pen Pals with Atlantic Hearts Challenge

Hello!  For this week's sketch I decided to create a batch of cards that were fun yet easy.  You may notice there is no stamping. I acquired this Pink & Main 6x6 paper pad called Pen Pals.  It really had the cutest images and great sentiments on the cut apart pages, so I used this sketch added in the gatefold twist.  I created 7 cards using this sketch and a few other cards that not using this sketch.  I've already shared several of these simple yet unique cards.


Here's this week's sketch.


While the dog was my favorite image, the snail is my second favorite.  Since this paper pad was second hand there were some sheets missing from the pad.  I used the background paper here up quickly while making this batch.


Ingredients:
Pink & Main Pen Pals 6x6 papers
misc card stock

I would like to enter this in the following challenges:


Thanks for reading today.  Don't forget to play along with AHSC until Sunday evening.

Alicia


Friday, July 4, 2025

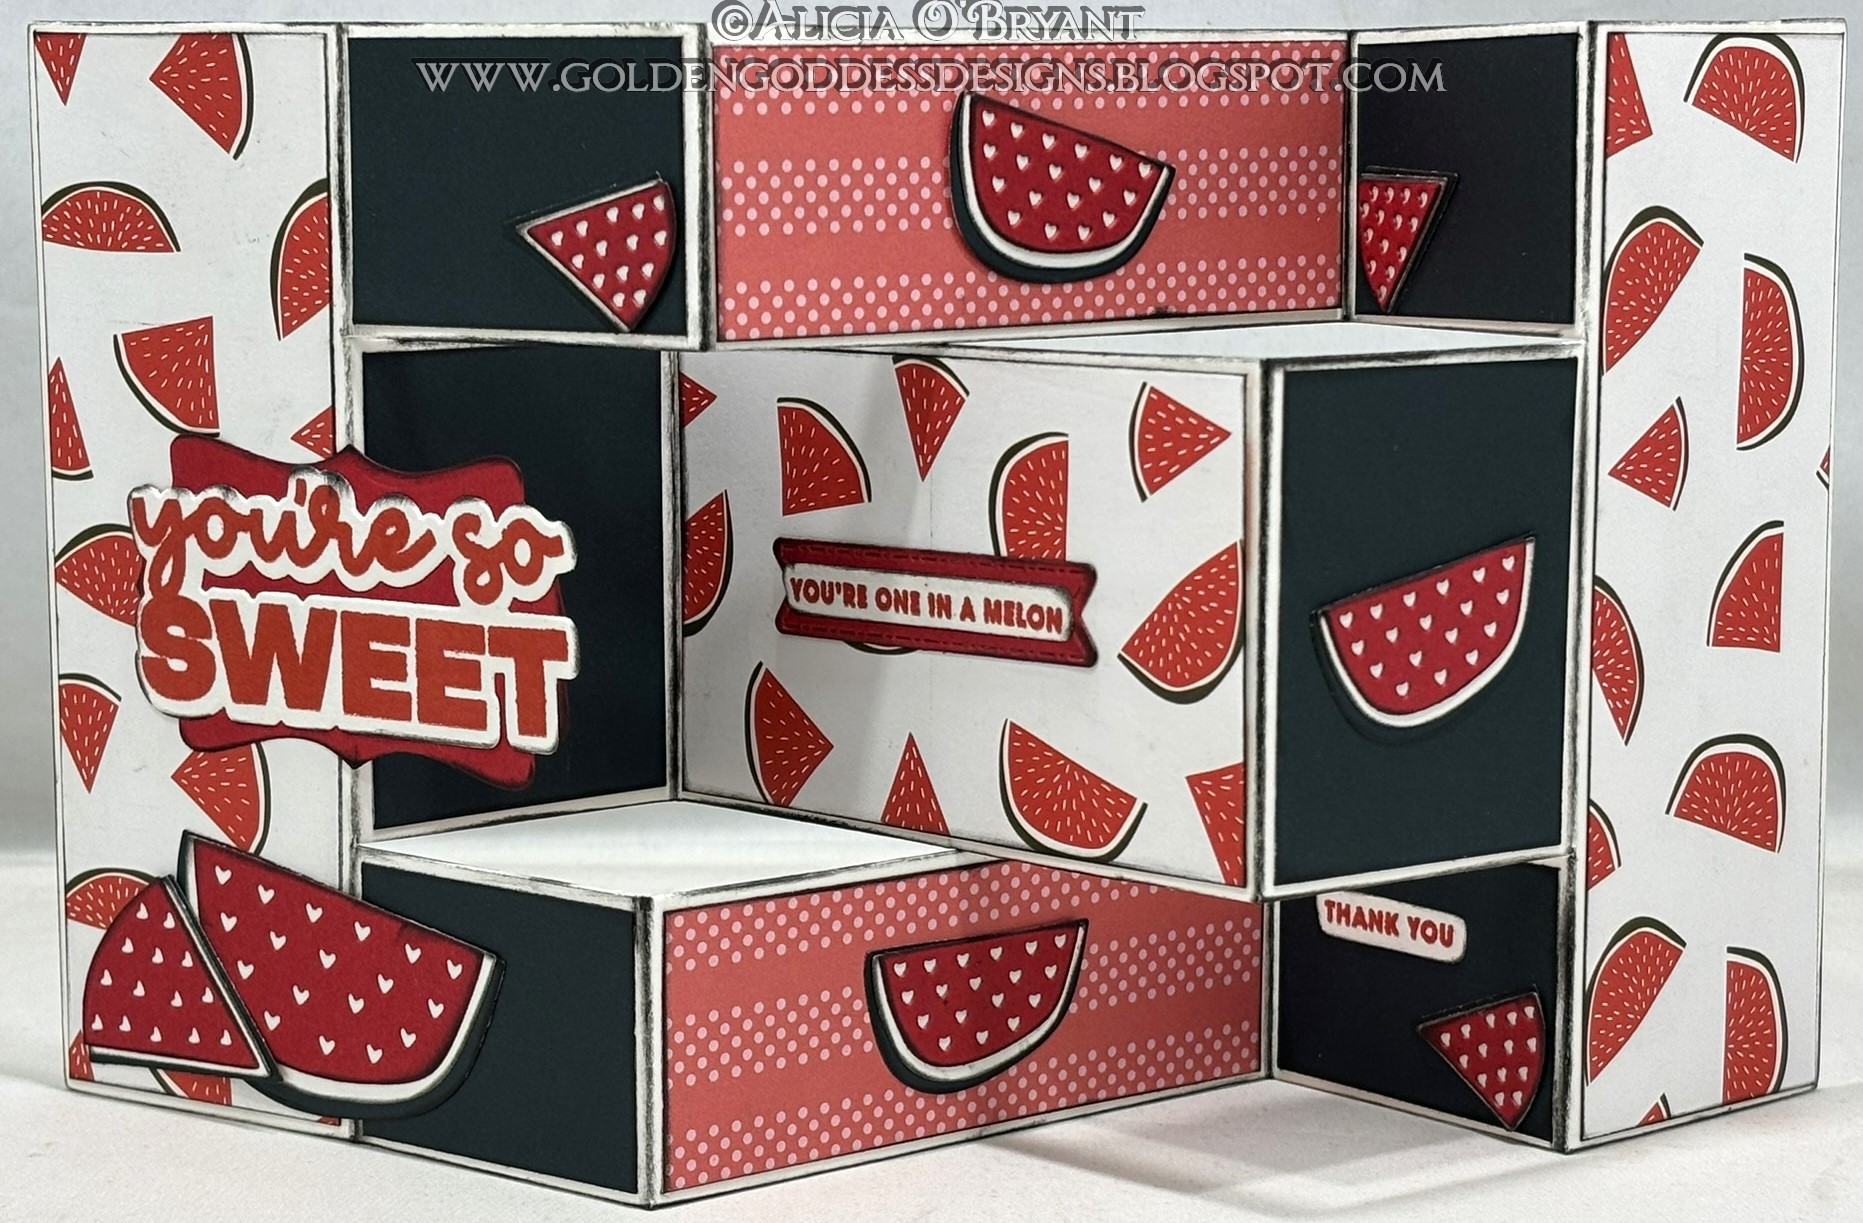
You're So Sweet Scrapbook.com Special Fold

You're so sweet to stop by and check out my card today!  I hope you have a great day and enjoy today's card. I spent a lot of time die cutting and designing on this one.  I was very pleased with how it turned out. I primarily used Scrapbook.com product papers, stamps and dies. I used a prefolded card base.


I just adore how the watermelons have hearts for seeds. I also stamped the sentiments and die cut them.  I inked all the edges as it my preference.


I used a Spellbinders label die cut to layer behind the large sentiment.  I was then able to adhere just half so the sentiment remains intact when folded and unfolded.


Ingredients:
Spellbinders Petite labels 1
Stampin Up Word Window punch
Kindred Stamps Sentiment Strip die
UPDATE:  I found the precut base package. The base was the Tri Shutter cards from Our Daily Bread. It came with 2 each of 3 colors. I used both whites.  I will be showing off the second card soon. I still have two ivory and two kraft bases.


I would like to enter this enter in the following challenges:


thanks for reading about my project today. have a great day!

Alicia

Saturday, June 29, 2024

Fly Over the Rainbow! Kindred Stamps

Welcome!  I could not let this month go by without a rainbow card.  However, this one is a bit on the dark side.  I used some darker paper scraps to create this unique rainbow.  I also added used some Kindred Stamps on the inside.


A peek of the inside.


I thought a darker image was appropriate for the inside.  I created the sentiment by using pieces of the sentiments in the set.


Ingredients:
Sizzix Fold-a-long Rainbow card die
Kindred Stamps Journey Home stamps
Various alcohol markers
Versamark black ink

I would like to enter this in the following challenges:


Winner!

Thank you for stopping by and I hope you had a wonderful Pride Month.

Alicia


Monday, February 15, 2021

Double Trouble's Crazy Cousin Layers Challenge

Hello, it's time again to be a Crazy Cousin for Double Trouble Layers Challenge.  This challenge is all about layers.  I tried a new fold and piled on the layers.

Here is my project.  Double Trouble asks that you tell them how many layers and trying to count, I believe there is more than 10!!  I die cut, inked, colored, stamped and fussy cut to create this scene.


Here are the details of the challenge. I added pearls to the center of the die cut flowers to comply with the twist.

My card began with this layer. I created the folds and determined what sides would "show" and inked those pieces up with Distress Oxide Bundled Sage.  The center was die cut with the vine die so it didn't need to be completely inked.  The center panel is 5.5"x5.5" to fit the vine die cut.


Here is a side view.  I watched a video but because I die cut the front instead of making that side the back I had to make it work with my changes.  I don't know that I would make it this way again.  


One tip I took from the video was to reinforce the front panel with extra layers.  I die cut another half sheet of the vines and glued it behind just off center to create a shadow.  The bottom is reinforced with a thin layer of die cut "grass". I also glued the die cut layer with the fairy and mushrooms directly on the front panel.  I layered a die cut and inked pieced of grass which was 1.5-2" in height.  I added a drop of glue to the fairy's leg to provide support from the taller grass layer.  I also stamped a mushroom cluster on that layer.


I used Distress Oxide Forest Moss on the next two layers.  I dusted all the layers with green shimmer ink before assembling the card.  The trees are die cut and embossed from the same set and inked with Forest Moss.  The are not sprayed with shimmer ink.  I stamped flowers on the first hill layer.  The two hill layers are opposite sides of the die cut.


I colored the die cut mushrooms and fairy with alcohol markers.  I used Spectrum Noir shimmer alcohol on the dress, wings and hair of the fairy.


The back of the shadow box is a sheet of paper from the kit.  I also cut the flowers and purple vine from printed paper.

Ingredients:
Crafter's Companion Build a Scene box including dies, stamps, pearls and papers
Distress Oxide inks
Spectrum Noir shimmer ink pens
alcohol markers

I would like to enter this in the following challenges:


Don't forget to join in the challenge over at Double Trouble Layers Challenge until February 28.  Thanks for stopping by.

Alicia