Showing posts with label Club Q. Show all posts

Sunday, February 16, 2020

Stinkin' Cute Quick Quotes layout

This a layout to add to my nephew's scrapbook.  It was simple as I used left overs from a Quick Quotes kit.  However, the negative paper proved to be an excellent frame.  I popped it up on foam to cover the edges of the very thick ribbon.


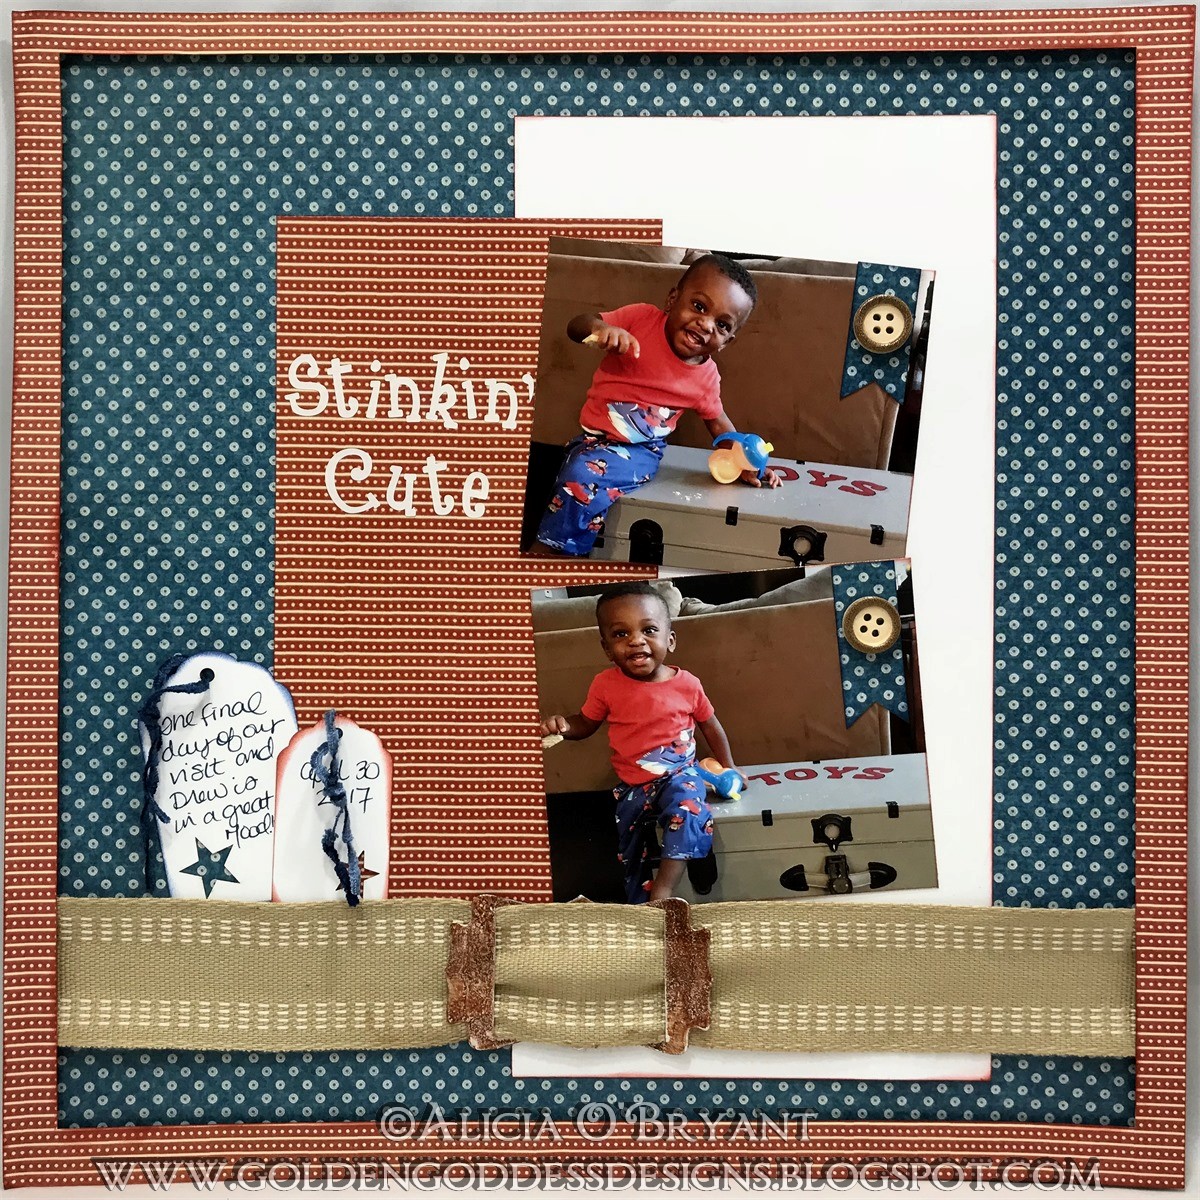
I used both Creative Memories and Stampin Up punches to create the tags also utilizing negative with the punched out star to dress up the simple white tags.  Well, I also inked them which I am very fond of doing and added some rich velvety fiber.  These are some great pics I took of a visit too long ago.  It is time to go again!


I tried to ink up this buckle.  I used alcohol inks hoping it would stain the metal, it worked to some degree.  I am not sure if I needed to treat the buckle prior to using the inks.  I also tried it on an altoid tin with the same iffy results.


Ingredients:
Quick Quotes page layout containing Graphic 45 papers, ribbon and buckle
Creative Memories sticker letters
Tag punches from Creative Memories and Stampin Up
Star punch (inside tags)
Quick Quotes Powderpuff chalking inks
white card stock
buttons and fiber


I would like to enter this in the following challenge:


thank you for stopping by today

Alicia

Tuesday, October 16, 2018

Fall Colors: Quick Quote October Club Q layouts

Hello, Alicia sharing my take on this month's Club Q.  I loved all the oranges, reds and gold in this month's kit.  I found the perfect pictures for the title from a hike in my local park.


To create this layout, I followed these steps:
  1. Open kit and punch out die cuts
  2. Color white die cuts with a ink, I choose Desert Sun PowderPuff Chalking Ink
  3. Ink edges of remaining die cuts
  4. Adhere layers together
  5. Arrange die cuts and photos on 12x2 designer paper
  6. After finalizing design, adhere all pieces


The second page uses the negative of a die cut page.  I had several photos of this fun trek to fill most of the squares.  In the spare squares I filled with paper and die cut leaves in the kit.


Here is a close up of the die cuts.  I inked the yellow leaf with Desert Sun.


With the leftovers I created a card.  While I chose to use the richer side of the paper on the layout.  I picked the softer side for the background of this card. Here are the steps I took. 
  1. Ink the negative from a leaf die cut
  2. Layer it on a leftover square
  3. Wrap a bit of ribbon around and used pop dots to lift off the card  
  4. Stamp the sentiment in Mango Mai Tai on leftover white chipboard
  5. Layer pieces on top of two layers of coordinating designer paper
  6. Layer on folder white card stock in size A2


Quick Quotes Products:
Powderpuff Chalking inks:  Desert Sun and Mango Mai Tai 


Thank you for stopping by today!


Monday, April 16, 2018

Quick Quotes April Club Q Video Unboxing

Hello, Alicia here today unboxing this month's Ultimate Combo Club Q April kit.  I made my first unboxing video showing in detail all the projects that come in the kit.  You can sign up for Club Q here.  


Here are the four projects you get with the Ultimate Combo Club Q April kit:


I created one of the altered projects in a timed setting to see how long it would take.  This project the larger of the two mini tag albums took me 1.5 hours.  I do like to chalk all my edges.  I used the reverse side of several papers to make it my "own".


Here are some pics of the inside.  Club Q makes it so easy to put together with most of the cuts and score marks completed for you.  I tied some ribbon and created the photo tab by layering chipboard pieces.  The cascading flip on the back inside cover was so easy with score marks and pre cut holes, it could not have been more simple.  Chalking all the edges probably took the most time.


Quick Quotes products:
Powderpuff chalking inks:  Bermuda and Terra Cotta


Don't forget to check out the unboxing video and sign up for Club Q here.

Thanks so much for stopping by!