Tuesday, March 11, 2014

Latest pictures of my studio...

So I saw this article about artist studios recently and thought it was interesting:

It made me want to document my every changing studio.  I did a "10 second tidy" (moms with certain age children will get this one). In reality it was an all day tidy and then I took some pictures.  After the looking at my pictures I made a few more changes.  It really helped to look at pictures of my junk to determine the best place to put it, and no not on the curb as my husband would like...

Here are my pens, I used to keep all the types of pens separate i.e. markers, stamp pens, gel pens.  I finally decided to organize them in a rainbow.  It is working so far! but I have not gotten around to cataloging my colors yet...as per Tiffany's Scrap Rack organizational challenge:


A view from my seat.  I have already re-organized the ribbons on the spools at the bottom of the display.  The small spools fit just fine in my "rainbow" iris containers, so I made these ribbons holders all large spools that are bulky in my "rainbow" iris containers and "rainbowed" the colors which was already in the beginning stages.


You can see my handy color chart of inks within arms reach of my chair.  (Pinks are showing).  I have cataloged inks, mists, and embossing powders.  Still need to do  paints and pens.


My small embellishments (brads and buttons) are "rainbowed" in small bead containers.


The RAINBOW of Iris containers!  This is my go to for EVERYTHING!  I am amazed at how quickly I can find exactly what I am looking for for at any given time!  Just the right red or green paper or embellishment found with ease!


My hand made Scrap Rack (an old catalog display from my office) on top of an old cart covered in tie dye duct tape (also from my office).  I have "collections" still in the 6 carry containers underneath.  The cart rolls so that I can use the A/C in the window in the summer.

The two CM containers contain all my 8.5x11 cardstock for cardmaking.


My bead space....


Storage for less used catagories. Paint and mixed media storage.
I have already changed this all around!  It just looked so junky.  I didn't like storing on the floor either.  So now there are some of the iris containers on the floor on top of the mixed media storage.


Pink containers are stamps.  The stack on the floor is sorted and the stack on the shelf is unsorted.  After this picture I felt like I was slacking and cataloged two more containers!  I am very near the halfway mark in cataloging all of my stamps!!  My fingers are still inky!!

The blue containers are power layouts.  I have a couple of albums already in progress.  One is four containers equaling about four physical albums and the other is two.  I don't know if I will be able to fit the two (one and a half) containers into one physical album.  I hope so, it is my honeymoon album.  The rest are full of open packs of pages and protectors.  The shelves are full of unopened albums, protectors and pages.  My completed albums are stored in the china cabinet which at this time is at least 35 or so...


I have also moved my cricut cartridges to the end of the green shelves.  The look really neat and are really accessible.  The junk on those shelves has been distributed elsewhere...


Some paper stacks and papers that I have multiples of (12-25 of each) and some kits are stored here:


My straight stand has only cardstock, not papers.


Here you can see underneath my desk.  The brown accordion folder is full of CM ABC stickers.  My patterns are handy to cut shapes!  The blue container on my desk contains my acrylic blocks, very handy.  My hubby took some of those out of his truck (for parts) and said can you use these?  I can't stack on top of this one because some of my acrylics are large, but I love having them so handy and I can just throw them in, unorganized but still organized!


My most used categories:  calendar year is in the rack on the left and boy stuff and travel on the right.  CM collections are stored in the clear containers on either side.


Under the other table:  One drawer set has punches in two drawers and adhesives in the bottom and the other is all old SU sets still in there plastic containers.  I have not been able to bring my self to take my wood block stamps off the wood.  I see the benefits in space, but I still like them.  I just have vowed not to purchase any more.  


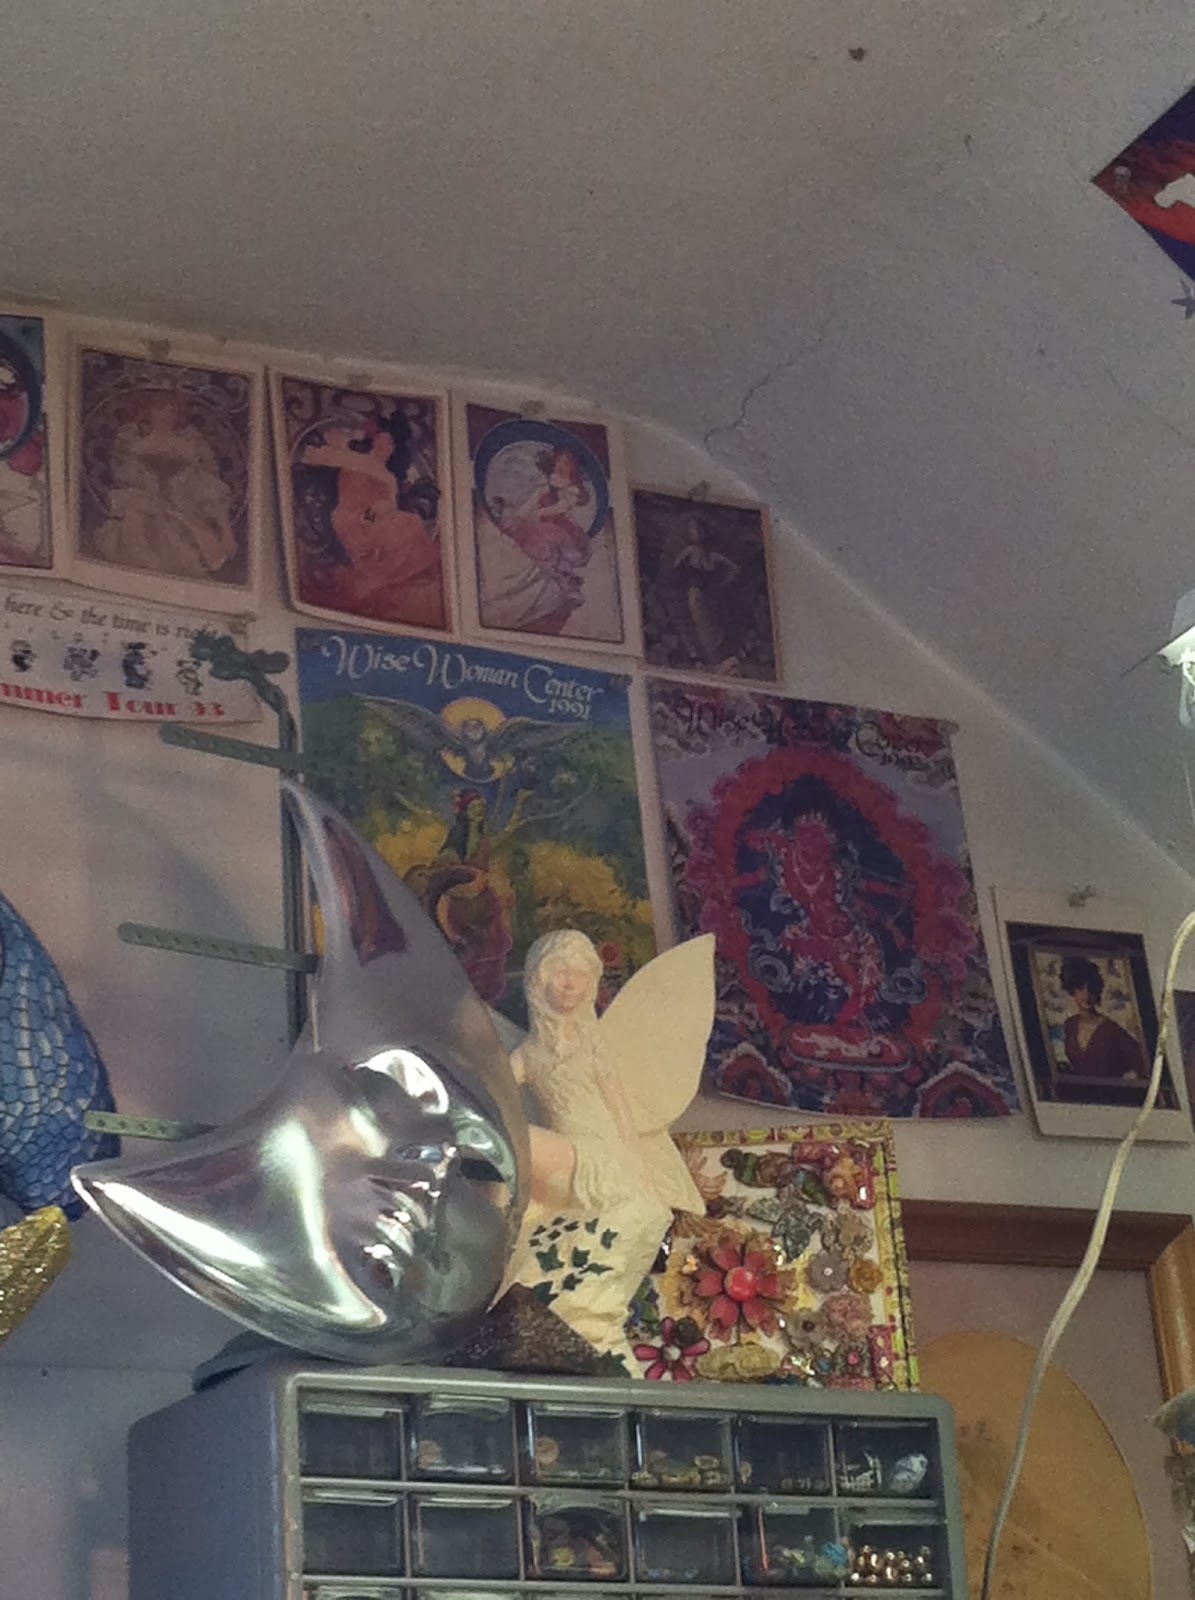
As you can see I have lots of junk around my room~art if you want to call it that...this is a "toy" my friend and I created jointly at my son's bday party at The Toy Lab one year.  It is very special to me.


A display I used to use in my jewelry booth before it started falling apart.  It is better to not travel with it.  I also made the gourd.  It is one my now deceased grandfather harvested.  I used blues and purples, it is my "Mourning gourd" as I created it after his death.  I also created it around the time of a friend's father's death, so it is in mourning of the "Great Father/Grandfather".


A half way finished ceramic fairy....someday!  One of my first altered cigar boxes is behind it.  Lots of brooches, beads and broken jewelry on it.  

A view from the door.


My Sizzix big shot and dies are in the large iris containers on the floor underneath the extra table (and my garbage can).  I brought this table out for a friend to work on...my son now uses it most.  I am trying to keep it clear to be able to throw the big shot up there or sort through things easily.  

The other side of the room:


Cataloged stamps, now even more!


Uncataloged~now a smaller stack!  The green container on top has embossing stuff.  I have to laugh seeing the hair spray...I use more hair spray in crafting than on my hair!!


Power layouts


The dark green are sorted by manufacturer.  I have Paper Loft all together because I am on their design team.  I have Graphic 45 scraps and stamps together.  Letters are in the clear containers~now on top of mixed media.


Memorabilia, not great, but hey at least I have one year in one container! 


A beautiful doll from
 another artist and my latest award!


Thanks for stopping by and taking a look today.  I hope I didn't bore you with my studio tour...Be sure and check out Tiffany Spalding's Organizational Challenge!


Sunday, March 9, 2014

Celtic Tree Sketch Card

Today's card follows the sketch challenge over at Fusion card challenge.  I used a white card stock base with Graphic 45 Le Cirque Collection Wizards of Wonder paper for the mat.  I stamped this Amazing Art Celtic Tree stamp with Colorbox Green Apple and embossed with Sparkle N Sprinkle Irish Spring.  I used AC glitter ribbon, metallic floss and gold washi tape.  I used a gold shimmer paper cut with Spellbinders standard circles and CM corner rounder on the other piece.  I used a SU label punch to cut out the Amazing Arts sentiment also stamped and embossed. 


This was my prototype.  I first used a light green CM paper and diecut it with Spellbinders scalloped circles.  Also instead of the washi tape and gold floss, I added a sheer AC ribbon on top of the glitter AC ribbon.


I am entering this in the following challenges:

http://fusioncardchallenge.blogspot.com/2014/02/fusion-5.html until March 10


http://avenue613.blogspot.com/2014/03/challenge-62-anything-goesoptional.html until March 14
(with Irish blessing)

http://stampedblessings.com/2014/03/amusing-challenge-green/ until Mar 18

http://www.conniecancrop.blogspot.com/2014/03/monthly-challenge-20-green-with-envy.html until Mar 31

http://reasonableribbon.blogspot.com/2014/03/rrr-challenge-90-show-me-green-ribbon.html until Mar 12

http://die-cut-divas.blogspot.com/2014/03/lets-emboss-it-march-challenge-is-under.html until Mar 31

http://scrapbookblessings.blogspot.com/2014/03/challenge-14-punches-galore.html until Mar 15

http://stampinpearls.blogspot.com/2014/03/stampin-royals-march-linky-party.html until April 3

http://brownsugarchallenge.blogspot.com/2014/03/challenge-84-make-it-sparkle.html until Mar 12

Thanks for taking a look at my project for today!

Saturday, March 8, 2014

Happy Birthday Blog Hop!


Welcome to the Happy Birthday Blog Hop


It's Connie Can Crop's Birthday weekend and what better way to celebrate than with a super blog hop full of fabulous projects, a spectacular lineup, and yummy presents for 2 lucky followers!!

Connie Can Crop is the first stop on her Birthday blog hop. Welcome to her Birthday Bash!!

This is a one day blog hop and we appreciate your leaving a comment for all of these talented friends who are here sharing their ideas and creations. 
We have TWO awesome sponsors and giveaways for this hop!


ABusyBee
Is giving away 3 delicious Spring Colors of Skittles!!
What's a skittle?? Check out her store Here:
http://doubleclickconnections.blogspot.com/p/store.html


 Connie is  giving away a gorgeous 6x6 paper pad and  may just throw in some fabulous LoveBug Creations Rumple Ribbon too!!
 
So what do you need to do to win? Easy... become  a follower of each of the fabulous blogs in this hop and leave each of them a  comment letting them know what you like best about their projects. 
 
Then come back to Connie Can Crop and post that you followed the rules.
You will have until 12:00 am Monday to finish the hop and leave your comments. 
Winners will be announced on Wednesday at Connie Can Crop.
Be sure to follow everyone and leave a comment  along the way!
 
Gonna Party! It's Connie's Birthday! Let's go!

Happy Birthday Connie!  This card is for YOU! 


I used my brand new Stampin Up Perfect Banner Framelits dies with matching stamps from Perfect Pennants and Banner Greetings sets.  I also used my new SU papers and inks, Raspberry Ripple and Primrose Petal.  I threw in some CM patterned paper and some hand made paper from India.  I finished it off with some silver pearls and a segment of Mardi Gras beads that I found in my metallic embellishment container!  I have no idea where they came from (a kit ?) but they were the perfect addition to this pretty pink card for Connie!
 
Since I only had one strand of beads, the second card is with Tim Holtz silver tinsel.  I have used 3 banners, 2 stamped images and 1 strand of beads/bling!

 
I hope you have a wonderful birthday weekend Connie!


 Up next is Angela - www.crazy3monkeys.blogspot.com 
 
Here is our complete line up in case you get lost along the way.
1. Connie- www.conniecancrop.blogspot.com
2. Jenny - www.crazyaboutcricut.blogspot.com
3. Janet  - http://janetscreativeworld.blogspot.com/
4. Sandy - http://simplycraftycreationsbysandys.blogspot.com/
5. Beth~ http://thecraftyscrapyard.blogspot.com
6. Shawnee-http://sunshinycards.blogspot.com
7. Ellen-http://cardmonkeyspaperjungle.com
8. Sharon - http://piece-ofheart.blogspot.com
9. Pam - http://lovebugcreations3.blogspot.com/
10.  Alicia http://goldengoddessdesigns.blogspot.com
11. Angela - www.crazy3monkeys.blogspot.com
12. Jessica http://craftinandstampin.blogspot.com
13. Kathy - http://kathyand3kids.blogspot.com
14. Lori - http://scrappinmystressaway.blogspot.com/
15. Robin L. - http://create-a-latte.blogspot.com
16. Holli - http://SunflowerHolli.blogspot.com
17. Carri - http://doubleclickconnections.blogspot.com/

Be sure to leave everyone a comment to be entered to win!!

I am entering this in the following challenges:

http://brownsugarchallenge.blogspot.com/2014/03/challenge-84-make-it-sparkle.html  until 3/13

http://fussyandfancychallenge.blogspot.ca/2014/03/challenge-109-birthdays.html until 3/20

http://leftofcenterchallenges.blogspot.co.uk/2014/02/challenge-26-die-cuts-with-ikes-art-and.html until 3/13

http://stampinfortheweekend.blogspot.com/2014/02/sparkle-and-shine.html until 3/13

http://totallypapercrafts.blogspot.com/2014/03/challenge-209-female-birthday-must-have.html until 3/13

http://craftycreationschallenges.blogspot.com/2014/03/challenge-258-happy-birthday.html until 3/17

http://shoppingourstash.blogspot.com/2014/03/sos-141-3-2-1.html until 3/10

http://toptiptuesday.blogspot.com/2014/03/3-5-or-7.html until 3/17

http://lovetocreatechallenge.blogspot.com/2014/03/challenge-105-recipe.html until 3/8

http://perfectlyrustics.com/2014/02/23/prdc-17-shades-of-1-colour/ until 3/8


Wednesday, March 5, 2014

The Paper Loft Island Sun Sandals, Ocho Rios layouts


I have been playing with my newest Cricut cart Elegant Edges!  I have used The Paper Loft's Island Sun collection.  I have used Sand dollar, Poolside, and Starfish.  I have used the Vacation and Pool accessory sheets. 


On the first page I used the layer and the second page I used the border.


Close up of page two.


Both pages together.


 I can't wait for all this snow to be gone!  Think sunny thoughts!  Thanks for checking me out!  

Wednesday, February 26, 2014

Cookie Monster Sketch N Scrap Sketch


Here's my take on one of this month's Sketch n Scrap sketches. 

 
I cut the gears and arrows from silver foil paper using Tim Holtz Alterations Sizzix die cuts and movers and shapers.  The Hershey kiss stickers are pretty old, finally a good place for them!  Burlap printed ribbon is from HL and some miscellaneous brown brads to center the die cuts.  Creative Memories cardstock.

 
I am entering this in the following challenges:


Thanks and have a blessed day!

Monday, February 24, 2014

The Paper Loft February Sketch

 Good morning!  Today I have my take on this month's sketch from The Paper Loft.  I have used papers from the Island Breeze collection.  I used some cricut cuts, the flower is from CM Reminisce Accents and the blue paper is cut with Elegant Edges.  I chalked the edges with a Versa Magic Aegean Blue teardrop.  I punched with the SU curly label punch and stamped the senitment with an old SU stamp (no longer with the original set).


Close up.  I added some pearl bling.  I made this card for a friend.  I hope it brightens her day!

Here is the link to The Paper Loft's challenge:


I am also entering this in the Fabulous Cricut challenge All about you!  Because CM Reminisce is the first Cricut cartridge that I fell in love with...


Thanks for stopping by!

Butterflies, Flowers and buttons using Heartfelt Creations & Spellbinders Dahlia

This card is from a card tic tac toe card swap.  I chose the row with butterflies, flowers, and buttons.  I used American Crafts Letterbox Signed paper.  This is the first time I have ever used the Heartfelt Creations stamps and Spellbinders die cut combo!  I have had these forever but was always intimidated by the intricacy of the flowers Heartfelt Creations makes.  I took a class from them once and the flowers were already made for the layout.  I really wanted to see how they go about the process.  But I have finally attempted it after years in a box!  I choose not to layer the flowers because then you could not see all the hard work I put in to stamping the HC Dahlia 2 stamps with Brilliance Pearlescent yellow and embossing them with Ranger Enchanted gold embossing powder! And finally cut with Spellbinders Dahlia.  I really need to see HC again and get the Dahlia 1 set, I hope they still have it!  If I had had the other stamp set, I could have made all the intricate layers I need for the flowers. 
 
 
I sent the best cards for the swap, the two I took pictures of have some mistakes to them.  I don't think they are too bad though.

 
I used a Wilton doilie  as a layer and the flowers are cut and embossed from the reverse of the signed paper.  So the inside (which I forgot to photograph) is the same green with a CTMH sentiment stamped and embossed in the same yellow and gold but on an AC peachy paper that matches.  The sentiment is "sparkle and shine" from November's SOTM Illuminate.  Sorry I didn't take the picture.

 
Pretty yellow buttons and floss.
 
Thanks for reading!
 
I am entering this in the following challenge:


Sunday, February 23, 2014

Spring Themed Cards


I made these cards for a Spring themed card swap.  

 
I used Stampin' Up Top Note Die cut and embossed it with SU Cloudy Day folder.  I used Creative Memories cardstock on a DCWV Spring Card Base. 

 
I embossed the flowers with Judikin's Pastille embossing powder.  The stamp is Purple Daisy who makes matching stamps for EK Success punches.  I added decorative tape as the stems and CM and SU bling to finish them off!

 
Since I cut the Top Note diecut in half, there were left and rights...

 
I had some more flowers so I used another DCWV card base for a couple.
 
 
I am entering this in the following challenges:

http://cuttinandstampinchallenges.blogspot.com/2014/02/weekly-challenge-14-7.html until Feb 23

 http://craftingfromtheheartchallengeblog.blogspot.com/2014/02/challenge-7.html until March 1

http://joannamunster.com/2014/02/20/inspired-by-stamping-monthly-challengeflowers/ until March 6

http://blog.docerelashop.com/2014/02/design-team-post-challenge-56-anything.html until March 11

http://greatimpressionsstamps.blogspot.com/2014/02/february-challenge-floral-images.html until Feb 28

Thanks for stopping by!  Have a blessed day!  Happy Birthday to my only Son!


Saturday, February 22, 2014

Pets Blog Hop with The Creating Blog Hops Cafe


Welcome to this month's blog hop with...
The Creating Blog Hops Cafe'

Love is in the air this month, so we wanted to show a little love to a our Fur-Babies.

Here we are in our second month on the last Saturday of the month to inspire you with some wonderful projects. This month's theme is..."Pet's"
So, grab yourself a Latte' and hop along with us while we proudly show off our projects and our Fur-Babies.


Your first stop on the hop will be with...

Robin Lane from Create-A-Latte


Here's my project:


I used an older piece of Paper Loft paper. 
Then I used an overlay with paw prints.  I layered different papers from my stash.  I used my new We R Memory Keepers washi tape my SIL gave me for Christmas.  It was the BEST present!  It was the washi tape and large dispenser from Costco.  I didn't belong (to Costco) but knew about that item and wanted it!  I was thrilled to receive it!


This is really old tulle that I have gathered up with a pin with a wood button.  I tacked it all down with mini glue dots which are also holding the "ruffles".


Another one of these embellishments accented with buttons.


 Nostalgia button accents and actual vintage buttons from my stash, flossed.  I used an assortment of ribbons from my stash and tucked this one under one of the buttons. I punched the heart with a Creative Memories 1.5" heart punch and added another button.

The letters are Tim Holtz grungeboard.  I misted with Tattered Angels shimmering mist Crème de Cocoa and chalked with Colorbox dark brown cat's eye.


Oh!  I forgot to journal and since there is an acetate overlay on this page, I had to use a slick writer, the brown is not really brown enough.  I am not exactly excited about how it turned out.  I may have to work on this more...


Now, for some candy. This month we will be giving one lucky person two Becky Higgins Project Life Themed Kits, one is the Dogs Kit and the other one is the Cats Kit. For your chance to win this amazing blog candy you must hop through each one of our talented crafters blogs, be sure to leave everyone a little blog lovin', and if you are not already a follower please become one to each of ladies so that you do not miss a single project that they make.


Your next stop will be with...


If you get lost along the way here is the entire line-up of today's hop for you to get back on track and not miss a single project. And don't forget to leave everyone a little blog lovin' and become a follower for your chance to win some blog candy.


Thank you for hoping along with us today and I hope that we have inspired you to get your craft on.


 I have loosely based my layout on this month's sketch from Once Upon a sketch.


I am entering it in their challenge and some more:


Again, thanks for stopping by!

Wednesday, February 19, 2014

The Paper Loft Everyday Life and Let's Get Sketchy

Whew!  It's been a while for scrapbooking, but the power layout boxes are on my desk as well as print outs of current sketch challenges in which to participate.  So many sketches have a place for only one picture or if there are multiples they are cut small.  I have my pics printed in the "digital" format (a little smaller than 4x6).  Yeah, I could go to my fancy printer and fuss until I can get these pics to a smaller size but I like the PICTURES!  That is why I scrapbook and as I have become a better photographer, there is less to crop out!  Good for me, but not conducive to scrapping sketches.  So this sketch was for one photo, I had 4 on my "power layout" page, but cut it back to the two best.  Therefore, my photo area is larger than the sketch, shrinking the "white" space.  I don't really like "white" space, so I have used The Paper Loft's Everyday Life No Excuses striped paper for my background.  I used TPL's Good Times accessory sheet for the title and matted and cut the paper banners from the solid sheets in this collection.  I used one printed banner, I cut from the packaging sheet, it was a sample of the Like Riding a Bike paper that I have used for the companion page, I liked the scale of the sample better than the actual paper for the banner. 


 I used my Sizzix to cut with Quickcutz's road sign set, the signs.  


Finally, the most time consuming part of the page was creating the tiny banner at the top.  I began with Heidi Swap trimmings (white) and smooched and spritz with many colors.  It did not look as I had envisioned, so I brought out the MM paints.  I took a sponge tipped dauber and painted the green dots and used a wedgewood color and a craft stick to edge the top and sides.  This banner is two pieces attached and overlapping. I made two sets and used the other two pieces on the companion page which I will post another day.  I edged everything with Versa Magic Aegean Blue and popped up some pieces with pop dots.


Thanks for taking a look, I had fun with this one!  messy and painty fun!
 
I am also entering this in the following challenges: