Friday, November 18, 2016

Thin die storage hack

Good morning dear readers!  I want to express how thankful I am for your following me and I promise some candy coming for December.  I have just been a bit overwhelmed with family commitments the last few weeks and of course, with the holidays in the next weeks to come.  I have not been playing along with many challenges.  I feel like my mojo is lacking...although I just love the few projects I have completed.  The last mini album I made just tickles me pink!  And I have a few wonderful items in store for next week.

I have been spending some time in my craft room just not creating but reorganizing.  I follow Totally Tiffany's organizational methods.  She offers FREE classes on a regular basis and some great organizational products.  But as I am sure like most of you, I just can't buy everything I want and sometimes we need a fairly easy and much cheaper hack.  I have one for you today.

I wanted to use these magnetic storage sheets but they are expensive. The cheapest I found in a two pack is Walmart with free shipping (link in pic) and direct from Crafter's Companion you can buy them by the 10 pack for $45ish and I didn't check shipping.  I recently received a two pack from my Scrapbook Secret Sister and they are wonderful but...I can't afford to get the amount I need.
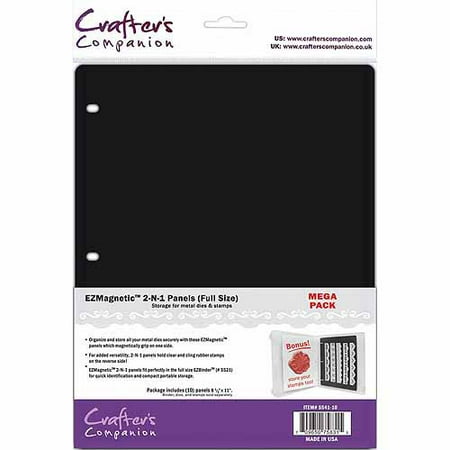
Image result for crafters companion magnetic sheets

I had already used the Magnetic Vent covers to cover a cork board and place my most used thin dies (circles, rectangles, etc) on the wall next to my die cutting machines. These are a 3 pack of 8x15 for less than $5 at Lowes.  I had a free Lowe's gift card...so free for me!


After some trial and error I decided using a sheet protector to make sure if the dies pop off while turning pages they fall inside the pocket.
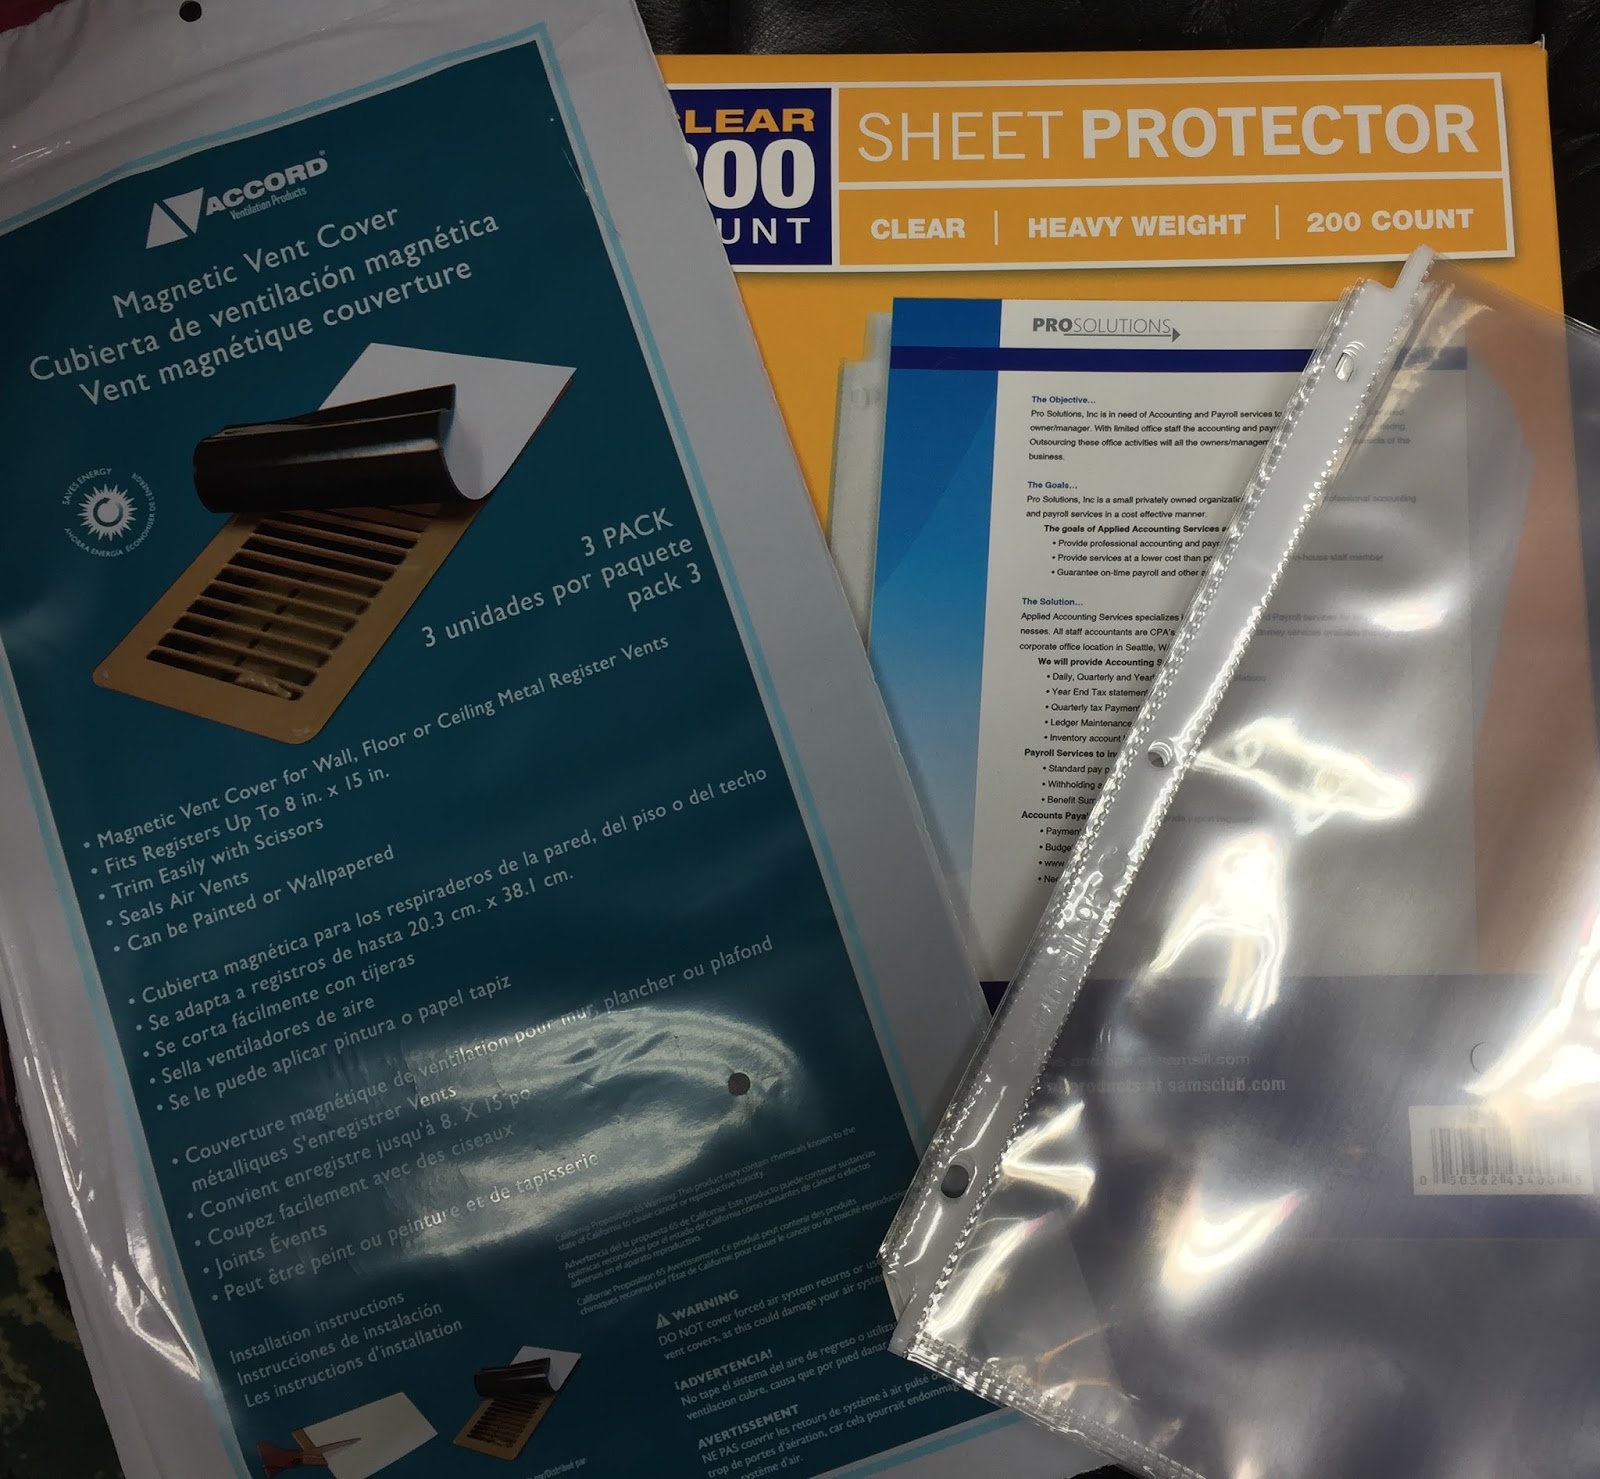

The magnetic sheets are very easy to cut with a trimmer although I advise using an old blade.  It definitely wore it out after cutting 15 sheets. 


At first I just used a 3 hole punch directly on the magnetic sheet so some of my sheets have holes.  The first page is my newly expanded sheet of word dies and it on the "original" product.  I used my two "originals" as the first and last page in my binder for sturdiness.
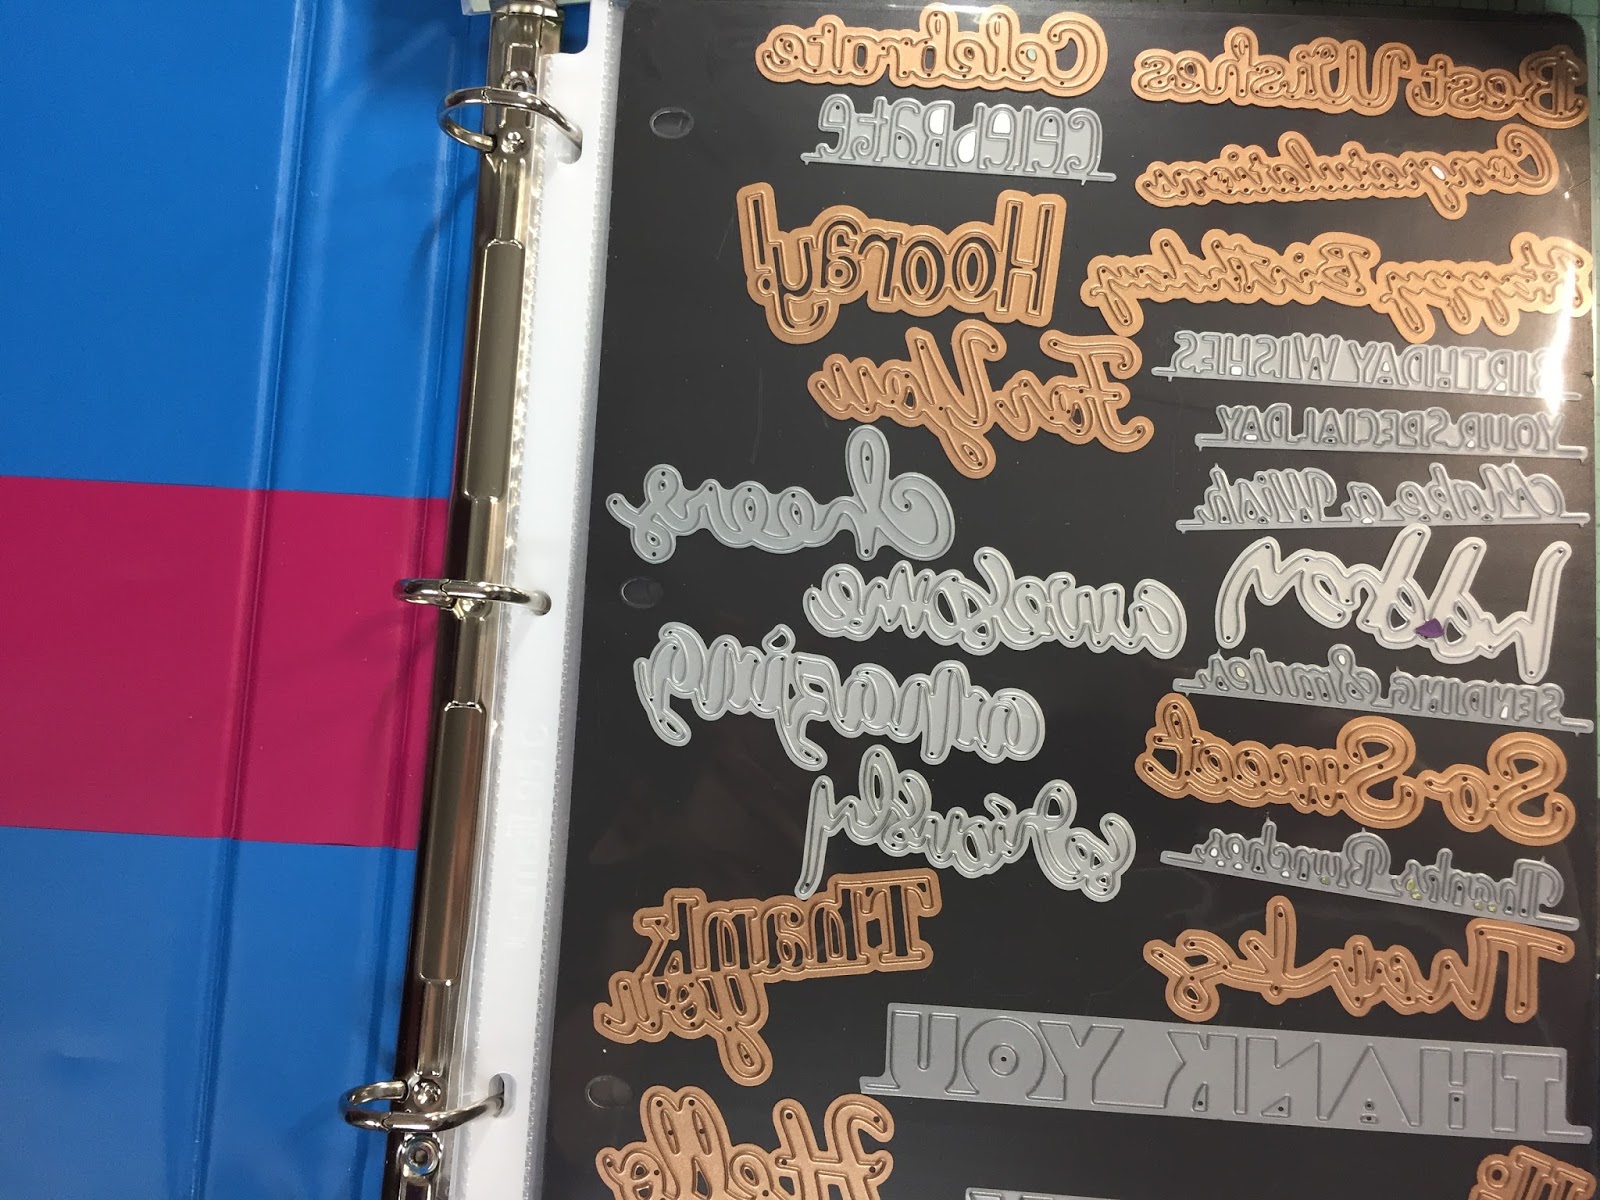

The pages are only 8" wide instead of 8.5" and the page is thinner. By using the page protectors it added some extra sturdiness but it is still not as thick as the original product.  However, it works for me!  Below are the sheets containing flowers and leaves.


As you can see the one side of the vent cover is white and your stamps will cling to it just as on the "original" product. I however, store my matching stamps and dies in another place using a different method with which I am pretty satisfied.  For this project I was looking for something like my the board on my wall that was easily accessible, where I could see what I have but I didn't need these dies right next to my station.


So I added the new binder to my binder area within reach of my primary chair.  BTW the binders were also FREE from my workplace.


This is not a very good picture, this stack was a few inches DEEP!  So much packaging that I am not using, but I am not throwing it away.  I am too much of a hoarder...but really every piece I kept has important information I may need about the product.  I disposed of most all of the plastic and extraneous packaging.  When I added this to my stash of old inserts...I found a label from a set I had been searching for the name.  I had searched everywhere and even inquired on Totally Tiffany's organizational Facebook page! No one knew the answer, but it was on the original packaging I had saved!  Sometimes it is good to hoard...or I will tell myself.


Thanks so much for stopping by!

Alicia

Tuesday, November 15, 2016

Quick Quotes and Want 2 Scrap Blog Hop: Best Day Ever Mini Album

Good morning Quick Quotes readers, Alicia here today, sharing a sweet mini album.  I used the Want 2 Scrap Chipboard Album and the Quick Quotes Winter Bliss collection to create a one of a kind gift. Highlights of the album include the Best day ever chipboard quote that I inked up with Baja Blue PowderPuff Chalking Ink and a die cut flower I made for the front.  I used tons of ribbon scraps around the rings and added lots of Want 2 Scrap bling and shiny things to dress it up.


To create the basic album I completed the following steps for each chipboard page:
  1. Ink edges of chipboard
  2. Cut paper to fit chipboard pieces
  3. Adhere paper to chipboard
  4. Sand all the edges
  5. Punch holes through paper layer
  6. Re-ink edges


Here are all the pages of the album.  I added plenty of pockets for memorabilia.  I punched several tags from various Quick Quotes Winter Bliss  papers, added ribbons and tucked them inside the pockets.  I also inked another chipboard title, Believe in yourself chipboard quote this time with Fuchsia PowderPuff Chalking Ink.  I think this will be the perfect gift for one of my four nieces.


Quick Quotes products:
Winter Bliss papers: 100, 101, 102, 103 and  104  - online soon!

Want 2 Scrap products:

other products used:
Sizzix Susan's Garden Lily die set
Heartfelt Creations eyelet oval die set
Our Daily Bread Designs pierced circle dies
Creative Memories and Stampin Up tag punches
markers, water pen, hole punch, sanding block, misc ribbon

Thanks so much for stopping by!


Creative Memories Peacock with Sketch N Scrap sketch


Good morning!  Today I have for you a layout using the latest sketch at Sketch N Scrap.  This layout came together so easily.  I seriously just grabbed some scraps from the top of this collection and chose a background piece and wa la!  These papers are so pretty but not really feminine, perfect for this layout.  I know the name of the restaurant but my hubby liked to refer to it as "la french place" hence the title.


Here's the sketch I used:


Ingredients:
Creative Memories Peacock collection
Creative Memories Blueberry sticker letters
Quick Quotes Blue Moon chalking ink

Thanks so much for stopping by and don't forget to play along with us at Sketch N Scrap!

Alicia

Saturday, November 12, 2016

"Corny"copia Blog Hop with Connie


Welcome to the 
"Corny"copia Blog Hop
Thank you for joining us for a fun weekend of "Corny" Fall themed projects. Lots of fun and puns!


You should have arrived from Holli's blog. If not, Connie Can Crop is the first stop in this hop. 
This is a one day blog hop and we appreciate your leaving a comment for all of these amazing crafters.


We have an awesome sponsor for this month! 


One lucky winner will win a Fall themed card kit.


What do you need to do to win? Easy... become  a follower of each of the fabulous blogs in this hop and leave each of them a comment letting them know what you like best about their projects.

You will have until 10 pm Sunday to finish the hop and leave your comments.
Winner will be announced on Wednesday 11/16/16
Be sure to follow everyone and leave a comment along the way!

Fall Leaves Me Happy!! Hope it Leaves you in a Pile of Smiles!

I made two cards for you today both using images from Cricut Autumn Celebrations.  


And card #2


close up of my cuts:


Ingredients:
Cricut cuts: Autumn Celebrations and Groovy Times
Graphic 45 Steampunk Spells & French Country 6x6
Our Daily Bread Designs Pierced Oval die
Colorbox Mix'd Media Truffle ink and Judikins clear detail embossing powder
misc cardstock, sentiment stamp, buttons, bling, floss and ribbon

 Up next is Michelle!

Thursday, November 10, 2016

Winter Wonderland with Quick Quotes Winter Bliss

Hello, Alicia  creating for you today.  I had so much fun with my latest delivery from Dies R Us!  I was so excited to play with the Avery Elle Pierced Cloud dies and the Poppystamps' Stitched Hills dies in particular.  At first I had the mind set that clouds were for spring cards, but then I started to broaden my horizons.  I think the crisp clouds with a touch of glitter pen are perfect "snow" clouds.


I popped up the individual clouds on top of the border of clouds keeping the pattern in place for a clean effect.  I gave most of the elements at least a spot of Wink of Stella clear.  It was perfect to replicate glistening snow.  I colored the remainder of my image with various alcohol markers.  I fussy cut the snowman with his feathered friend and popped them up as well.  He looks perfect sitting on the stitched hill.  I  just loved pierced and stitched details on dies!! There's plenty to be found at Dies R Us.


Dies used from the Dies R Us store:

Poppystamps - Dies - Stitched Hills (NEW)
Poppystamps-Stitched Hills
Avery Elle - Pierced Cloud
Avery Elle-Pierced Cloud

Other ingredients:
Quick Quotes Winter Bliss papers 101, 103, 104, 105
Inky Antics Snowy's Woodland Friends stamp
Brilliance Graphite Black ink
Tim Holtz Sizzix On the Edge Tree line
markers: Distress Tumbled Glass, Wild Honey; Copic E13; Hobby Colour Walnut; Prima A10
Quick Quotes Baja Blue chalking ink
white and light blue card stock
Wink of Stella clear


Please remember, each and every day of the month there's a new inspiration sample shared here on the blog by this fabulous design team.  Please be sure to pop in regularly.
And don't forget to come join in the fun at the Dies R Us Challenge Blog.  There's a new challenge theme offered on the 1st and 15th of each month and one lucky randomly drawn winner will receive a gift voucher prize to the Dies R Us Store.  For your convenience, all the important Dies R Us links are provided below. 

click below for:

Thanks so much for spending time with us today!

I would like to enter this in the following challenges:


check out this super cool inspiration:


Monday, November 7, 2016

So Thankful for You card: Quick Quotes with Want 2 Scrap

Good morning Quick Quotes readers, this is Alicia sharing today.  I am so Thankful for you and always appreciate your stopping by to see the design teams' inspirations.  This month we are teaming up with Want 2 Scrap and I have used their Gunmetal pearls-250 count to create a border along the side of my card.  I also played with this month's Quick Quotes' challenge: Tear it Up!  I used a shaped tearing tool to create a couple of layers that I inked up with Midnight Confessions PowderPuff Chalking Ink for a super sweet but distressed look.


Here's a hint to create an evenly spaced border:
  • I tied the twine first so I would know the amount of space with which to work
  • I lined up the larger pearls with the grid all the way down the left side
  • I went back and placed the smaller pearls in between for perfect spacing

I love how I can use three different Quick Quotes paper collections to create a card that matches so perfectly.  It shows the versatility of the collections and the creative thoughts of the designers to be able to blend them together so well.


Quick Quotes products:
49 Shades of Grey 102 paper (background for photos)

Want 2 Scrap products:

other products:
Ranger Distress embossing powder Dried Marigold
Versamark ink
Inkadinkado sentiment from Harvest Expressions
My Mind's Eye chalk twine
Creative Memories scallop tearing tool


I would like to enter this in the following challenges:


Thank you so much for stopping by!


Saturday, November 5, 2016

Heartfelt Creations Delightful Daisies with Sketch N Scrap sketch

Time for Sketch N Scrap's first card sketch of the month.  I thought the Heartfelt Creations flowers just lent themselves to the card perfectly.


Here's the sketch:


Details of the daisies:


Ingredients:
Basic Grey Sweet Threads 6x6 paper
K & Co recycled paper (purple)
Heartfelt Creations Delightful Daisy stamps and dies, Enchanted Dragonflies stamps and dies and eyelet oval die
Our Daily Bread Designs Pierced Oval die
Recollections Eggplant embossing powder
Colorbox Mix'd Media Berries ink
Stampin Up Sentiment from Sky is the Limit
Assorted Alcohol markers
Creative Memories fancy corner punch
Quick Quotes Purple Passion  & Soft Sage chalking ink
Wink of Stella clear

Thanks so much for stopping by!

Don't forget to play along at Sketch N Scrap

I would like to enter this in the following challenges:

I choose flowers, dies, and embossing:

(Embossing, die cuts and purple)


Alicia

Thursday, November 3, 2016

Holiday Card Set with Queen & Co A2 die

Good morning readers, Alicia with you today.  I didn't just make A card for you today, I made an entire SET! I had so much fun using the Queen & Co Squares die, I just couldn't stop.  I started with ten sheets of 6x6 Christmas paper so I would have a variety of patterns with which to work.  It was like putting together puzzles.  I played with pairing up the different patterns and chose some sentiment stamps that fit inside the square pieces.  The die is a perfect A2 which made it so easy!


I made three cuts out of white cardstock.  I stamped sentiments on various white pieces.  I also added sentiments that were stamped and die cut from Lawn Fawn Winter Big Scripty Words Dies and Stamps to add some variety to the set.  I inked the edges of all the pieces before assembly. My goal was to produce an entire set without lumpy embellishments to cut down on postage.  I believe I was successful.  I have a collection of interesting cards that were fun and easy to create.  The variety of pattern papers provide interest without embellishments.  


In the end I had eleven cards.  I made one card with a white frame to use up the majority of the remaining patterned pieces.  After all was said and done I had a few random pattern pieces, several white ones and two white frames.  


 Dies R Us product used:

Queen & Co. - Dies - Squares
Queen Co Squares die
Lawn Fawn - Winter Big Scripty Words Dies
Lawn Fawn Winter Big Scripty Words Dies


Lawn Fawn - Winter Big Scripty Words Stamps
Lawn Fawn Winter Big Scripty Words Stamps

Other ingredients:
American Craft 6x6 stack
Quick Quotes Midnight Obsession and Green with Envy chalking inks
Colorbox Rouge pigment ink
Brilliance Graphite Black ink
Recollections Vintage Blue ink
misc sentiment stamps

Please remember, each and every day of the month there's a new inspiration sample shared here on the blog by this fabulous design team.  Please be sure to pop in regularly.
And don't forget to come join in the fun at the Dies R Us Challenge Blog.  There's a new challenge theme offered on the 1st and 15th of each month and one lucky randomly drawn winner will receive a gift voucher prize to the Dies R Us Store.  For your convenience, all the important Dies R Us links are provided below. 

click below for:

Thanks so much for spending time with us today!

I would like to enter this in the following challenges:


Tuesday, November 1, 2016

Bo Bunny #foreveryoung Sketch N Scrap Layout Sketch


Good morning!  It's the beginning of a new month and time for the latest sketch from Sketch N Scrap.  I am showing off the last of my vacation layouts.  I am also still working with the Bo Bunny #foreveryoung collection.  There's plenty of fussy cuts on this layout.  I also used some of the random stickers from the alpha sticker sheet as doodles.


Here's the sketch:


Ingredients:
Bo Bunny #Foreveryoung paper collection
Quick Quotes Mango Mai Tai chalking ink
Creative Memories sticker letters

Thanks so much for stopping by!  Don't forget to play along at Sketch N Scrap this month!

Alicia