
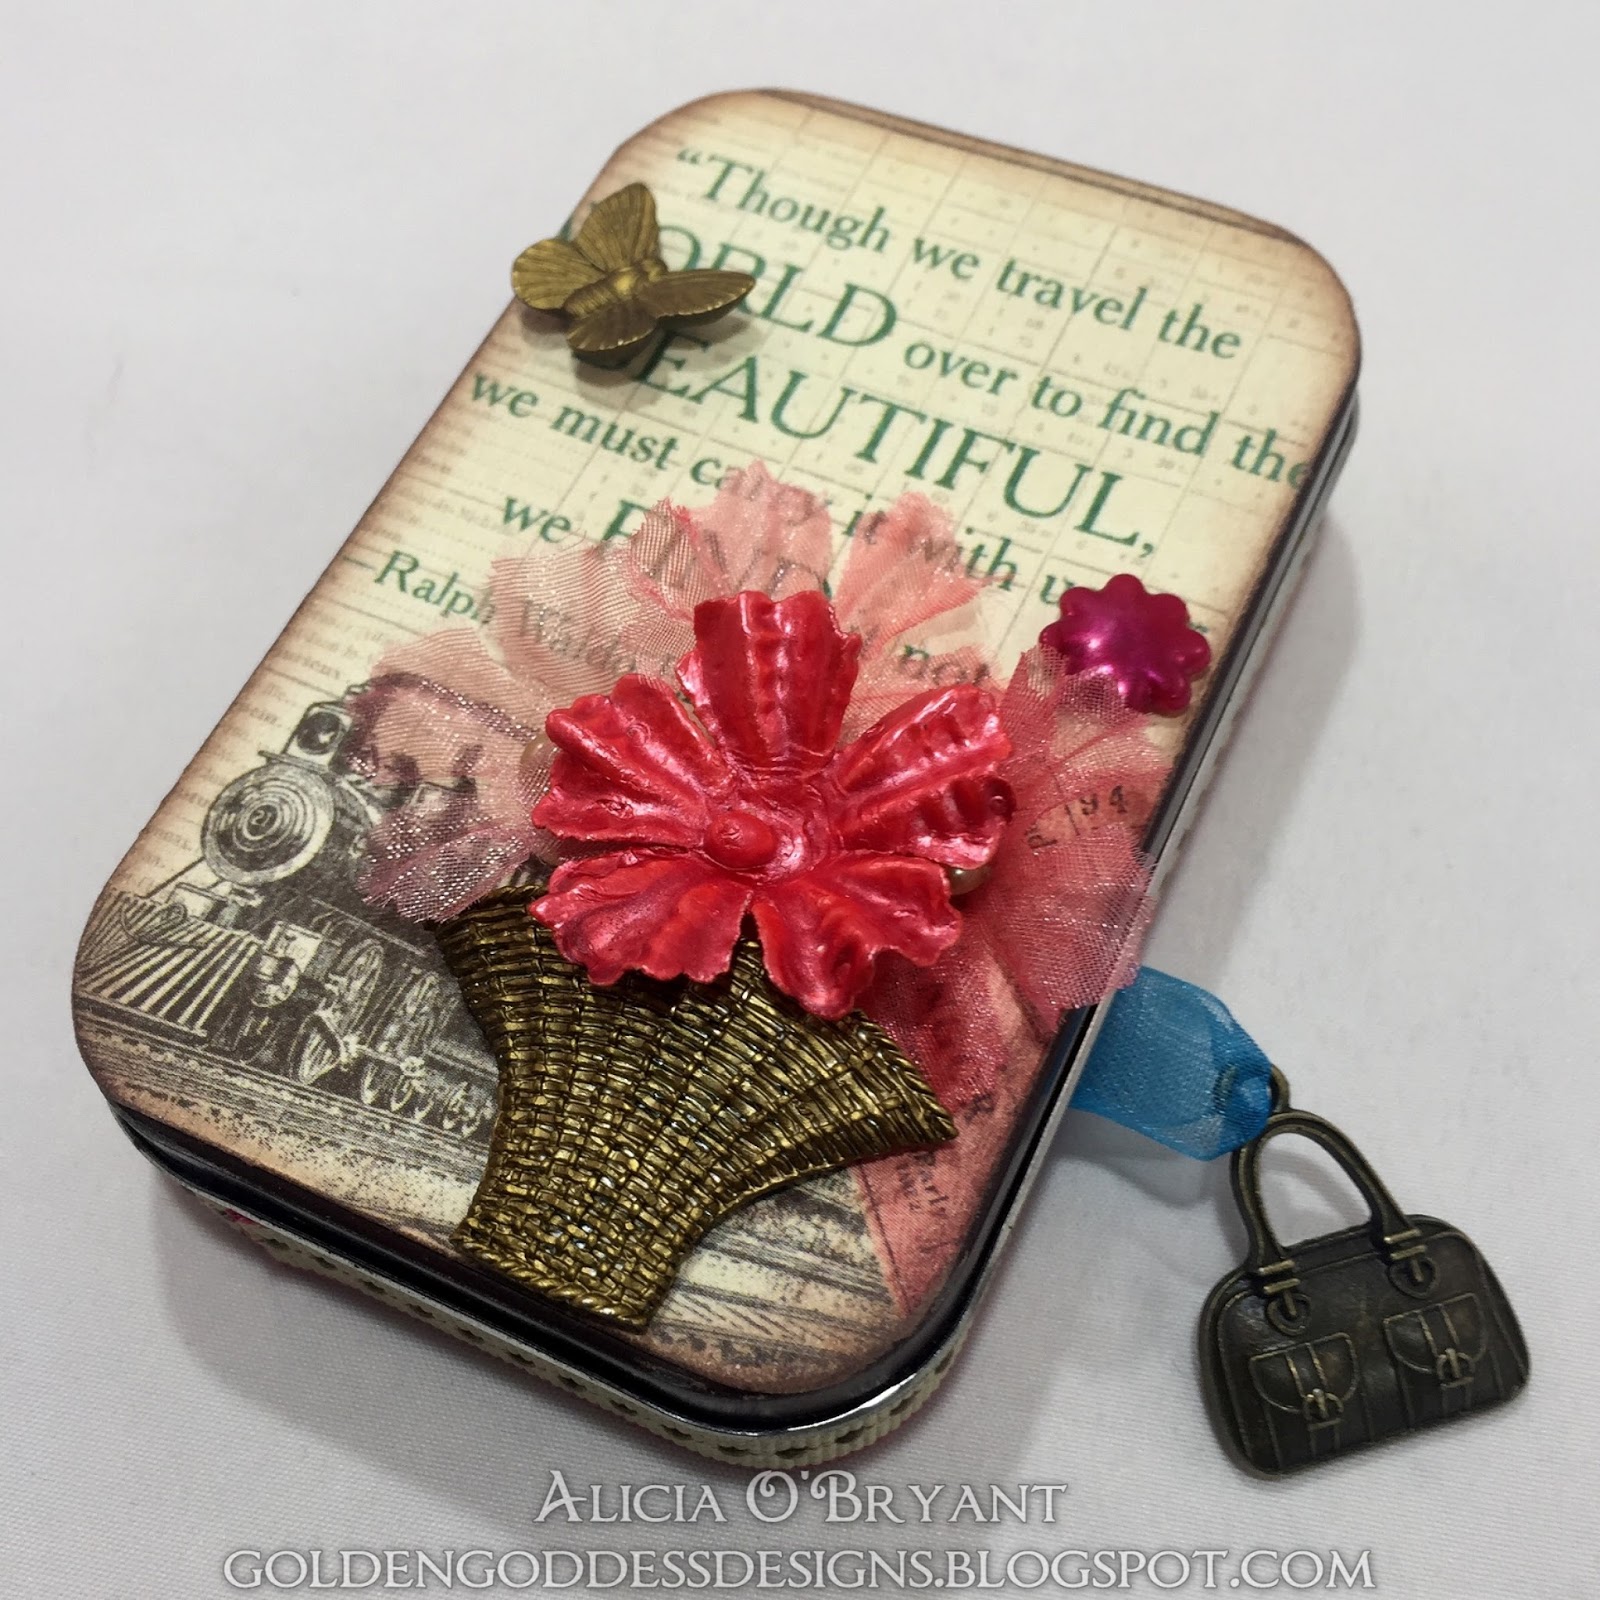
Happy Saturday dear readers! I have for you an altered object today. I created this beauty for a swap. I loved the way it turned out and plan on another one real soon.

Here it is open and inside expanded. The first page is a tag with the recipients name and address on it, so I covered it up for the photos. Since it was a "tag" I punched a whole and used a piece of ribbon and a charm for the pull tab to open the tin, it works like a charm (pun intended).


To begin this project I first dripped a few drops of alcohol ink in and on the tin and smeared it around. This provided a bit of coverage but not entirely. I was going for the shabby chic look so this worked fine. A warning I can give you is most paints won't stick to the metal, you can try to sand down the metal to get some paint adhesion. I prefer to just cover most of it with paper anyway.
I ran the front and back pieces for the inside and out through my Xyron to get complete coverage and adhesion to the metal. It is really hard to get the perfect size and corner cut, these pieces need to be slightly larger than the insert. I used my Creative Memories corner rounder on the corners but it helped but was still not a perfect fit, so I sanded the edges a bit. The corner rounder works fine for the mini album inside.

You can find the measurements for the papers to fit a standard Altoid Tin here. I did not use these measurements, I usually just wing it as I have completed a few of these now. I cut a 12" piece of card stock (not paper as this will be the base of your mini) down to the length that will fit inside the tin and scored it at a width that would fit inside the tin for the length of the paper and trimmed the excess. I used red lined tape in a very thick width to adhere sections of ribbon to hold my mini in the tin. I used this tape on both side to ensure stability. The adhesive one uses is crucial without a proper adhesion your project will start falling apart the more wear it gets. I sandwich the ribbon between the mini base and the decorative papers.


I decorated the inside lid with flowers and embellishments including a foreign stamp from my stash.

And now I will bore you with lots of snapshots of the inside showing closer details. I cut the decorative papers just a tad smaller than the card stock base. I inked all the edges, it was time consuming but the look you get is so worth it.


Thanks so much for bearing with all the photos of this project. The funniest part is my swap partner sent me a travel themed mini as well! We did not discuss a theme at all but we both are known travelers so it was perfect.
Ingredients:
Graphic 45 Come away with Me paper
Jolee's embellishments
misc flowers, pins and embellishments
American Craft sheer ribbon
I would like to enter this in the following challenges:
http://conniecancrop.blogspot.com/2017/09/connie-can-crop-monthly-challenge-62.html until 9/30x
https://minialbummakers.blogspot.com/2017/09/mini-album-makers-challenge-blog-launch.html until 9/30

http://crafty-girls-creations.blogspot.co.uk/2017/09/challenge-39.html until 9/30x
http://alteredeclectics.blogspot.com/2017/09/september-challenge.html until 9/30
http://www.vintagejourney.com/2017/09/altered-art.html until 10/5x
Thanks so much for stopping by!
Alicia
https://minialbummakers.blogspot.com/2017/09/mini-album-makers-challenge-blog-launch.html until 9/30
http://crafty-girls-creations.blogspot.co.uk/2017/09/challenge-39.html until 9/30x
http://alteredeclectics.blogspot.com/2017/09/september-challenge.html until 9/30
http://www.vintagejourney.com/2017/09/altered-art.html until 10/5x
Thanks so much for stopping by!
Alicia
What a sweet mini book! I bet your partner was thrilled to receive this. Beautiful work throughout! ~Heather
ReplyDeleteThis is BEAUTIFUL!!! Very creative and well done, I love it. A hint on painting on tin, glass, plastic, etc.....use some Paint Adhesion Medium, I got some from my BFF who is one of the top decorative painters in the world. Thank you for joining us at Connie Can Crop.
ReplyDeleteSue - Connie Can Crop DT
https://suek86401.blogspot.com/
Beautiful work! Thank you for joining us at Connie Can Crop's monthly challenge. Good luck.
ReplyDeleteBrilliant way to use an altoid tin! Wow, what a wonderful album, I just love the cover, so many beautiful details!! Thank you so much for sharing it with us on the mini album makers challenge blog!
ReplyDeleteBeautiful work! Brilliant way to use an altoid tin! It's such a joy to have you share with us in our first challenge at Mini Album Makers
ReplyDeleteYour mini album is such a delight! The cover is beautiful and I just love the sentiment you used on the front. The pages are all wonderful, the bold edges to the concertina-ed pages really does draw the eye in (love how you continued the map). The handbag charm is the perfect finishing touch! Thank you for joining in our first challenge at Mini Album Makers.
ReplyDeleteThank you too for joining in our Altered Art challenge at A Vintage Journey. Anne xx
Such a stunning altered tin x Wonderful details both inside and out and thank you for sharing the step by step details. Great to have you on board with us over at A Vintage Journey.
ReplyDeleteTFS Annie Creative Guide xx
beautiful!
ReplyDeleteHi Alicia! Wow, this is so cool! There's nothing like a good upcycle and a good pull out book! Your design is amazing and I love the beautifully decorated tin cover. Thank you so much for sharing with our first challenge at Mini Album Makers. Hugs, Autumn
ReplyDeleteTravel theme + altered tin = amazing! This is such a great project. Thanks for joining the challenge at Mini Album Makers Challenge blog.
ReplyDeleteThis is perfect! You had me at Graphic 45, of course, but...then all the wonderful details and the fold out mini in the tin...wow! Wonderful work! Thanks for joining our FIRST challenge at Mini Album Makers!
ReplyDeleteAbsolutely gorgeous. I LOVE this! Thank you for sharing with us at Altered Eclectics this month. Sammy-x
ReplyDeleteSimply delightful - a lovely use for those stylish papers, and your accordion book looks just wonderful tucked away in the altered Altoid tin. Thanks so much for joining us on A Vintage Journey and for playing along with the first Mini Album Makers Challenge.
ReplyDeleteAlison x
Beautiful! Very creative! Thank you for joining Connie Can Crop's monthly challenge!
ReplyDeleteWhat a beautiful project! Thank you for joining us at Connie Can Crop, I hope you will join us again this month, it's all about die cuts!
ReplyDeleteMarji DT